May 07, 2024, 11:37:43 AM

Author Topic: FD3S DIY HID retrofit  (Read 36661 times)

Offline turboed13b

FD3S DIY HID retrofit
« on: October 25, 2010, 01:47:15 AM »
Tools:
philips/flat screwdriver
oven
dremel with sanding drums and cutoff wheel

Materials:
aftermarket housing
morimoto d2s projector
d2s bulbs (oem or morimoto)
ballast
e55 shrouds

projector/bulbs/ballast/shrouds can be purchased at theretrofitsource.com

Step1. Removing lens

Preheat your oven to 200f, then take a baking sheet cover it with foil and place your headlight housing on it and place it in the oven. Set you timer for 10 minutes and watch your housing carefully. DO NOT WALK AWAY, since every oven is different it may take a longer/shorter time to remove the lens.

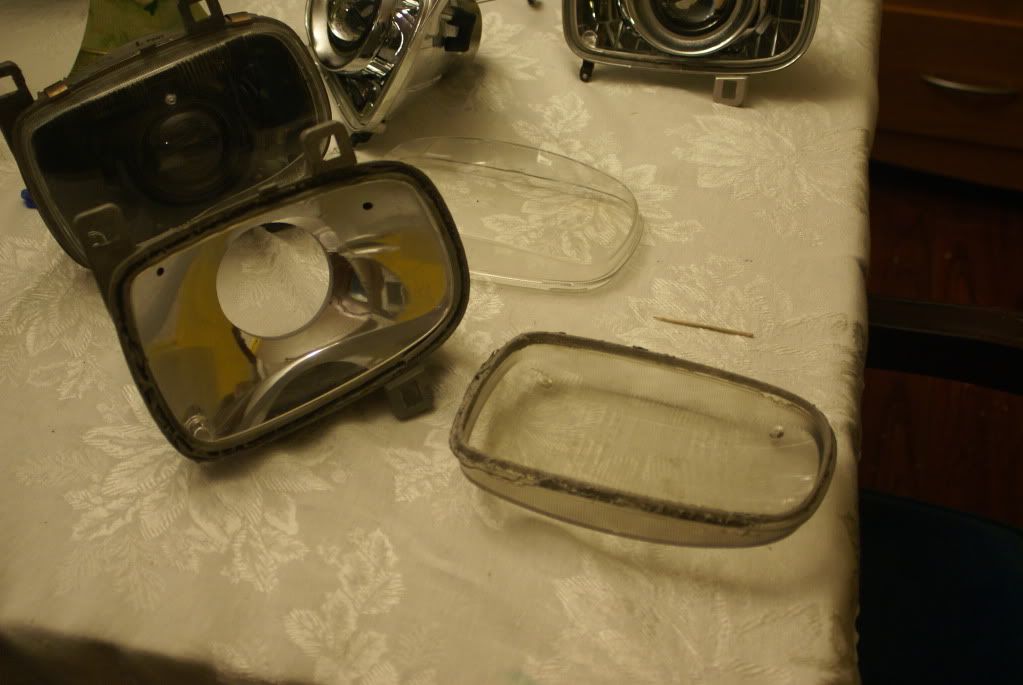
Take the headlight out and stick a small flat head screwdriver between the lens and housing and twist slowly. Do this all the way around until you can get your fingers behind the lens and Slowy pull it off. IF the glue starts to harden again simply put it in the oven for a few minutes and try again.

You should end up having something like this.


Step 2. Modify housing

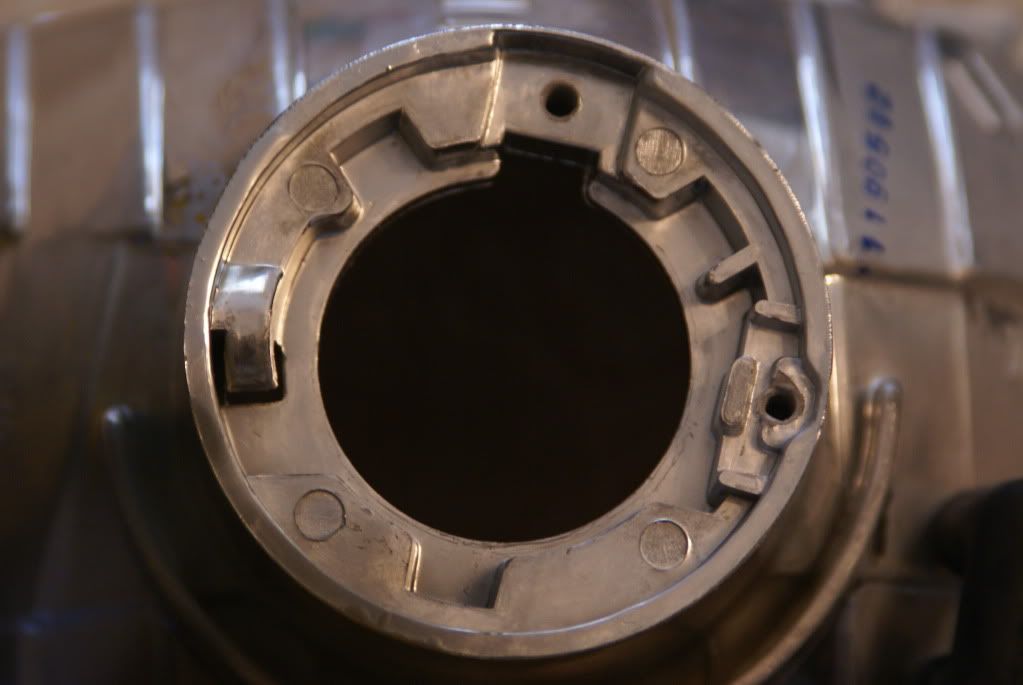
This is where you break out the dremel. you have the housing looking like this at first.


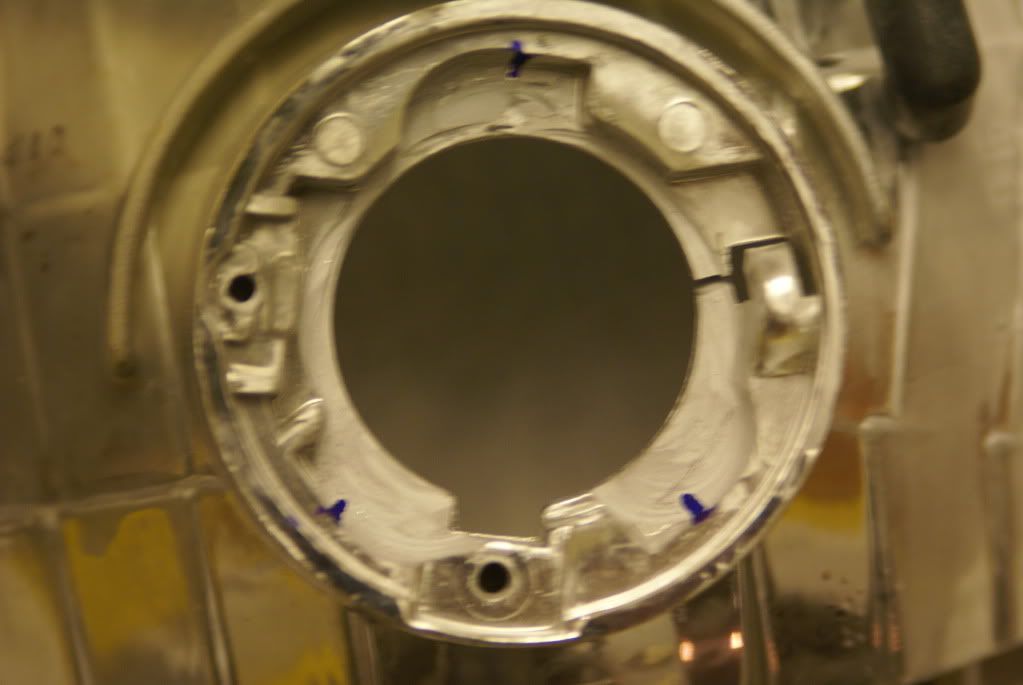
You want to cut and sand until it looks like this.


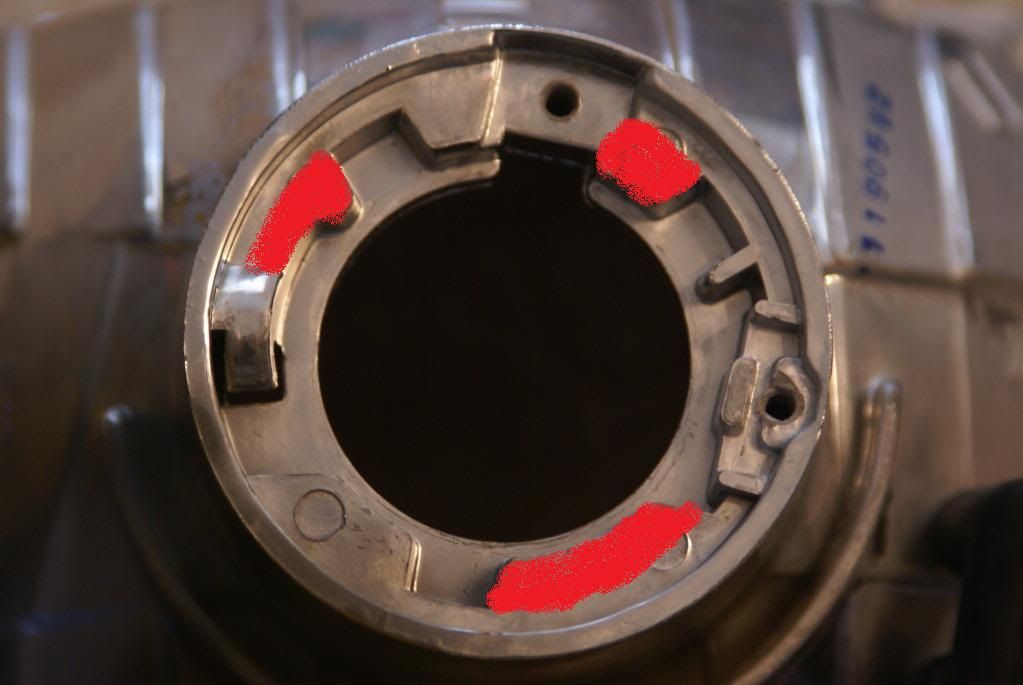
Here are the cuts made in red.


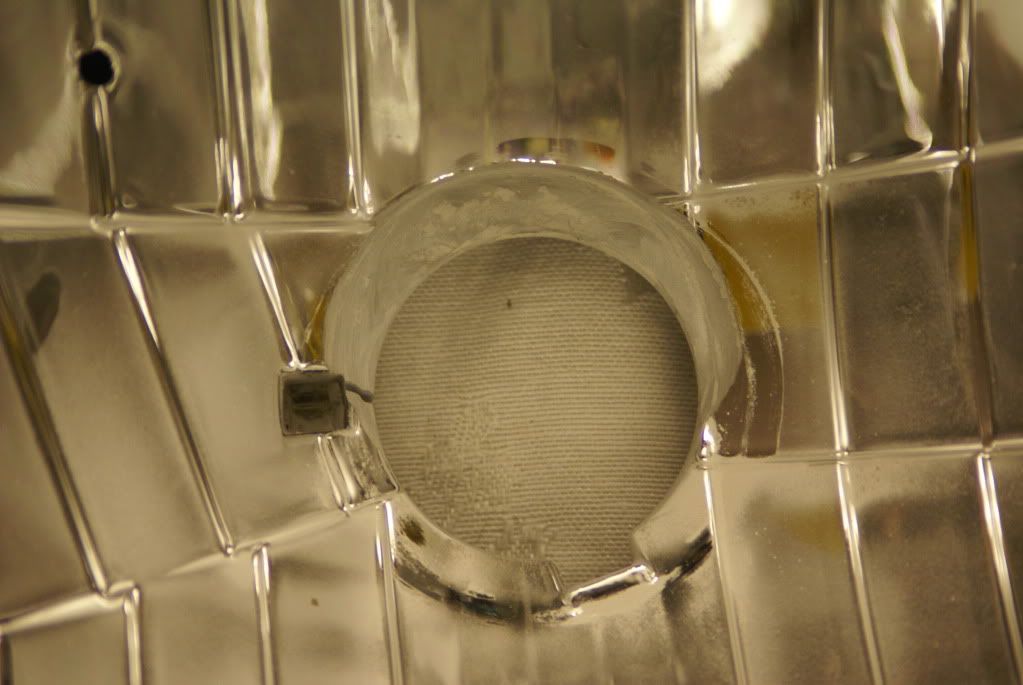
Now for the inside. Sand up into the housing, this is so the projector can be angle up to fit the shroud. You should end up with it looking like this.


Step 3. Bolt in projector
 
Insert projector from front side, place bracket on the back of the projector then screw the nut on. Pretty self explainatory.


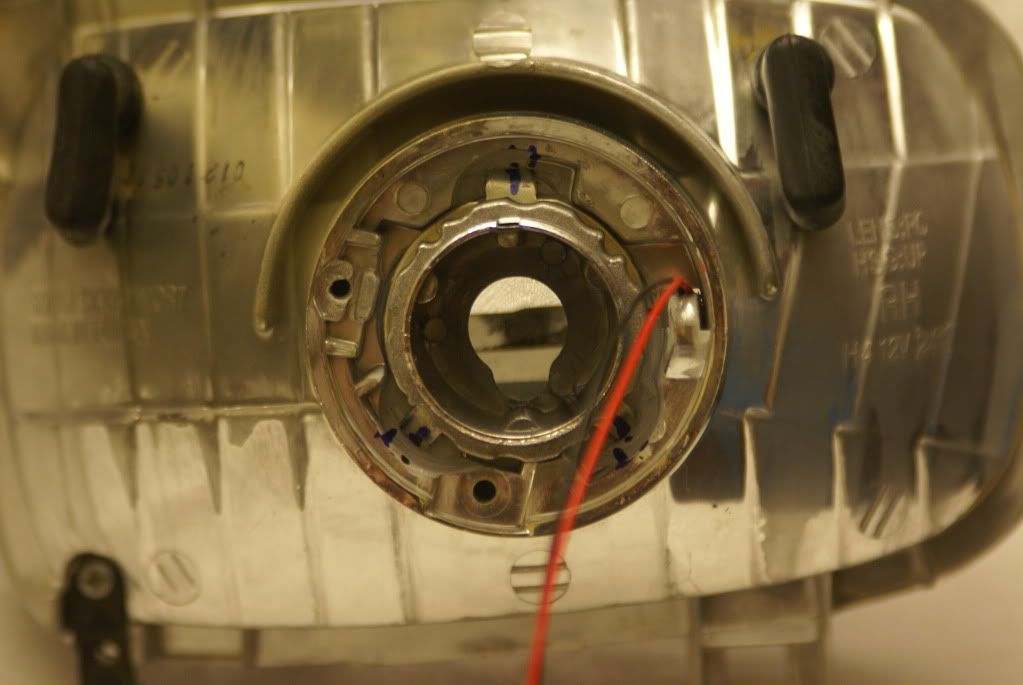
Step 4. Adjusting rotational cutoff.

After everything is all bolted up you have to run your relay harnes and mount your ballast to your car. When your finished mount your lights to your car plug your bulbs in and turn on your HID's. You will notice your cutoff isn't horizontal. To fix this you have have to twist the projector until you get your cutoff adjusted.

Next make reference marks as i did in the above photo just in case they move out of adjustment.

Step 5. Mount your shrouds

This step is pretty simple. First mount your shroud to test fit it you may have to sand the inside edge a little bit for it to fit. You may have to move the projector up/down to fit it into the middle of the shroud ,the projector has a some wiggle room since there is a rubber mount on the back of it.

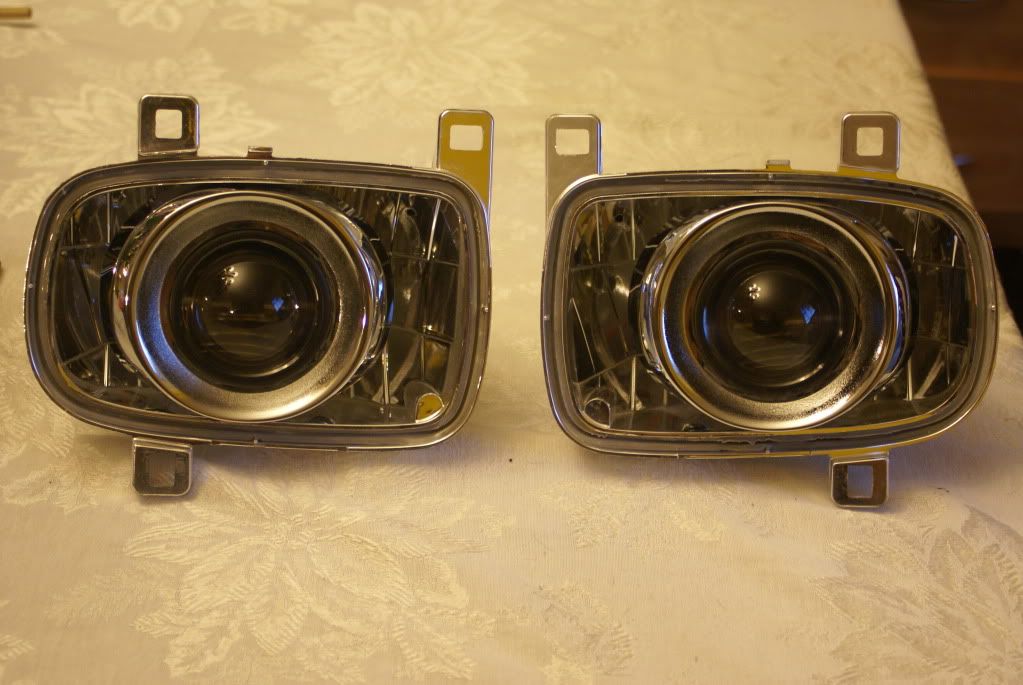
When everything looks fine remove shroud and apply glue between the shroud and projector and push it on. I would let it dry over night after completing this step. This is what you should have so far.


Step 6. Replacing lens

Now your project is almost complete. Simply follow the same steps as removing the lens. First place lens on the housing and gently push on it so it stays. Preheat oven to 200 then place your headlight in it but make sure you take out your bulbs before you do. After about ten minutes take out your lights and push on the lens firmly until it is fully seated into the housing. You can now put on the clips and screws back on.


CONGRATS! YOU ARE NOW FINISHED!


Offline AHarada

Re: FD3S DIY HID retrofit
« Reply #1 on: October 25, 2010, 02:04:56 AM »
Great job.  Nothing beats that factory HID cutoff.  What was your total cost to do this?
[smg id=6954]

Offline digitalsolo

Re: FD3S DIY HID retrofit
« Reply #2 on: October 25, 2010, 09:35:10 AM »
Nice walkthrough, thanks for posting.   :)
Blake MF'ing McBride
1988 Mazda RX7 - Turbo LS1/T56/ProEFI/8.8/Not Slow...   sold.
1965 Mustang Coupe - TT Coyote, TR6060, modern brakes/suspension...
2007 Aston Martin V8 Vantage - Gen V LT4/TR6060, upper/lower pullies, headers, tune.
2021 Tesla Model 3 Performance - Stock...ish.

Offline BlackSeven

  • Supporting Member
  • Staged
  • Posts: 658
  • Mike Cochran
  • View Gallery
    • View Profile
Re: FD3S DIY HID retrofit
« Reply #3 on: October 25, 2010, 10:19:54 AM »
Where are you sourcing the aftermarket housings? I can't seem to find them. Excellent writeup.  I think doing the labor yourself and sourcing parts from Retrofitsource really blows that sakebomb kit outta the water value wise. They're using the same parts, so theres no difference in quality.
1994 Montego Blue Touring
1993 Brilliant Black Base Heads/Cam LS1/T56 Daily Driver. - Sold.

Offline mattster03

Re: FD3S DIY HID retrofit
« Reply #4 on: October 25, 2010, 02:51:16 PM »
kick ass write up! me thinks I may have to do this :)
Current Car: 1993 Mazda RX7 Touring, LS1/T56, Stock Stock Stock

1993 Mazda RX7 R1, LS1/T56, EPS 230/238, TSP Ported heads
10.826 @ 128 , 1.53 60' - SOLD

Feature Article - http://www.importmeet.com/blog/2012/03/29/best-of-both-worlds-v8rx7guys-ls1-swapped-1993-mazda-rx-7/
Swap Info - http://www.cardomain.com/ride/2801662

1986 Mazda RX7 GXL, LT1/T56 "Retired"
Swap Info - http://www.cardomain.com/ride/641869

Offline mattster03

Re: FD3S DIY HID retrofit
« Reply #5 on: October 25, 2010, 02:58:41 PM »
where are the E55 shrouds shown?
Current Car: 1993 Mazda RX7 Touring, LS1/T56, Stock Stock Stock

1993 Mazda RX7 R1, LS1/T56, EPS 230/238, TSP Ported heads
10.826 @ 128 , 1.53 60' - SOLD

Feature Article - http://www.importmeet.com/blog/2012/03/29/best-of-both-worlds-v8rx7guys-ls1-swapped-1993-mazda-rx-7/
Swap Info - http://www.cardomain.com/ride/2801662

1986 Mazda RX7 GXL, LT1/T56 "Retired"
Swap Info - http://www.cardomain.com/ride/641869

Offline turboed13b

Re: FD3S DIY HID retrofit
« Reply #6 on: October 25, 2010, 04:58:57 PM »
Where are you sourcing the aftermarket housings? I can't seem to find them. Excellent writeup.  I think doing the labor yourself and sourcing parts from Retrofitsource really blows that sakebomb kit outta the water value wise. They're using the same parts, so theres no difference in quality.

you have to search around google for a little bit and call around just type in rx7 crystal and some places should pop up.
where are the E55 shrouds shown?

2nd to last picture

Offline mattster03

Re: FD3S DIY HID retrofit
« Reply #7 on: October 25, 2010, 11:37:05 PM »
oh, gotcha... the rings around the HID unit
Current Car: 1993 Mazda RX7 Touring, LS1/T56, Stock Stock Stock

1993 Mazda RX7 R1, LS1/T56, EPS 230/238, TSP Ported heads
10.826 @ 128 , 1.53 60' - SOLD

Feature Article - http://www.importmeet.com/blog/2012/03/29/best-of-both-worlds-v8rx7guys-ls1-swapped-1993-mazda-rx-7/
Swap Info - http://www.cardomain.com/ride/2801662

1986 Mazda RX7 GXL, LT1/T56 "Retired"
Swap Info - http://www.cardomain.com/ride/641869

Offline mefarri

Re: FD3S DIY HID retrofit
« Reply #8 on: October 26, 2010, 11:47:43 AM »
Ok I'm doing this.  So these are the same parts as the Sakebomb setup?
"I'm not sure what your intent was because I don't speak "dumbshit", but next time, start your own thread. "

-Jimlab

"Otherwise it looks like something I can build over a weekend, if I spent the first day watching TV."

-Blake motherfucking McBride

Offline mefarri

Re: FD3S DIY HID retrofit
« Reply #9 on: October 26, 2010, 12:13:09 PM »
Did you use the 50w or 35w bulbs and what temperature?
"I'm not sure what your intent was because I don't speak "dumbshit", but next time, start your own thread. "

-Jimlab

"Otherwise it looks like something I can build over a weekend, if I spent the first day watching TV."

-Blake motherfucking McBride

Offline mefarri

Re: FD3S DIY HID retrofit
« Reply #10 on: October 26, 2010, 12:22:43 PM »
And are these the housings you're talking about:

http://cgi.ebay.com/ebaymotors/1993-1997-MAZDA-RX7-RX-7-CRYSTAL-HEADLIGHTS-LEFT-RIGHT-_W0QQcmdZViewItemQQfitsZModelQ3aRXQ2d7Q7cYearQ3a1993QQhashZitem2c5859d0aeQQitemZ190460842158QQptZMotorsQ5fCarQ5fTruckQ5fPartsQ5fAccessories


When I added up all the pieces including those ebay housings, it came to $375 before tax and shipping.  Not bad at all.  They do sell a kit on their website which knocks around $25 off the cost but you can't get the 50w bulbs or ballasts.  But with the kit option, there's a "wiring harness" selection.  What's that for?
"I'm not sure what your intent was because I don't speak "dumbshit", but next time, start your own thread. "

-Jimlab

"Otherwise it looks like something I can build over a weekend, if I spent the first day watching TV."

-Blake motherfucking McBride

Offline 93silverbullet

  • Supporting Member
  • Launching!
  • Posts: 1182
  • Faster than a speeding ticket...
  • View Gallery
    • View Profile
Re: FD3S DIY HID retrofit
« Reply #11 on: October 26, 2010, 12:25:01 PM »
So just to be clear, these are the parts you ordered from the "The Retrofit Source"?

Ballasts: Morimoto 3Five (35w)
Bulbs: New Philips 85122+ D2S
CCFL Angel Eyes: No thanks
Projectors: LHD (North American Standard)
Shrouds: E55-R
Wire Harness: 9003 Bi-xenon
Richard.


Offline Speedfab

Re: FD3S DIY HID retrofit
« Reply #12 on: October 26, 2010, 12:31:58 PM »
Thanks for the writeup, very cool.

I still wish I could get someone to find me a source for JUST the clear lenses.  I already have and have done everything else.


unless you own a turbo ls9 rx7 you do not know what the fuck you are talking about.

Offline RX7what

Re: FD3S DIY HID retrofit
« Reply #13 on: October 26, 2010, 01:34:30 PM »
Are these hi/low or low beam only?
PER AUDACIA AD ASTRA
95 FD #496/499 LS2   http://www.norotors.com/index.php?topic=4789.0

Norotors is far and away the best car forum on the Internet, bar none.

Offline turboed13b

Re: FD3S DIY HID retrofit
« Reply #14 on: October 26, 2010, 03:20:06 PM »
Ok I'm doing this.  So these are the same parts as the Sakebomb setup?

everything is the same except the projector bowl

So just to be clear, these are the parts you ordered from the "The Retrofit Source"?

Ballasts: Morimoto 3Five (35w)
Bulbs: New Philips 85122+ D2S
CCFL Angel Eyes: No thanks
Projectors: LHD (North American Standard)
Shrouds: E55-R
Wire Harness: 9003 Bi-xenon

i just got the morimoto bulbs and a h4 harness