May 04, 2024, 05:13:01 PM

Author Topic: Official LT1/FC Swap FAQ.  (Read 43775 times)

Offline RX7Driver4Life

Official LT1/FC Swap FAQ.
« on: May 16, 2010, 10:53:55 AM »
     I am making this thread to post useful information on swapping an LT1 into a FC chassis. I will be adding  the knowledge i have gained onto this thread and any info regarding the swap will be appreciated.

I will start bye adding some of the parts that made this swap easy. I also used a T56

::Engine Mounting::
     Of course for mounting of the actual engine I used Granny's Speed Shop Small Block Chevy mounting kit. It is not to expensive considering the amount of time you save and the quality of the kit. I just purchased the basic kit as no sway bar spacers are required with this swap. You also need to get a set of SBC motor mounts you can buy them from granny's or at any auto part for probably cheaper.
http://www.grannysspeedshop.com/

::Drive Shaft::
     For a drive shaft I used an 1984-1996 Auto C4 Corvette drive shaft that measures 27.5" from the center of the yolks. There have been many discussions that it is not the right length and what not, but i can tell you even with the stock front yolk it is a tight fit. You will need a new rear yolk to mate the drive shaft to the differential. I used Rockford Constant Velocities conversion flange, it is P/N: R2-2-3173. You will also need a couple 1310 U-Joints to assemble the shaft. You should get the assembly balanced by a competent drive shaft shop.
Costs: $68.50 Conversion Flange shipped, Drive shaft I paid $93.00 Shipped, and $10 for 1310 U joint.
http://www.rockforddriveline.com/

::Clutch And Hydraulics::
     I used a 7/8th" Willwood clutch master from Hinson Super Cars that is modified for the FC clutch pedal fork. I also bought it with the adapter which clocks it into an upright position. The kit was great came with 3 different reservoir options including a remote mount. Came with various fittings but i bought there banjo bolt and -4 an fitting. I purchased a 36" -4 an stainless steel braided line from ebay and bought a Male roll pin to -4 an adapter P/N  139026 from Mcleod Industries that made connecting the master to the stock T56 slave a breeze. You can get it at Summit Racing.
Costs: Master Cylinder and accessories $118 shipped, -4 AN stainless line $25 shipped, Stock Slave Cylinder $50 at Advance Auto, and Mcleod adapter $47.99(expensive little part)
http://www.hinsonsupercars.com/p-752-wilwood-master-cylinder-modified.aspx
http://www.summitracing.com/search/?keyword=139026&dds=1

More to come in next post.
« Last Edit: May 16, 2010, 10:56:51 AM by RX7Driver4Life »
93 LS1/T56 FD RX-7

Offline RX7Driver4Life

Re: Official LT1/FC Swap FAQ.
« Reply #1 on: May 16, 2010, 11:29:10 AM »
Continuation.

::Radiator::
     For a radiator I used summit universal 27" X 19.6" Radiator P/N SUM-380328. On this setup i had to cut a hole on the inside hood bracing to clear the radiator cap. I also used Summits universal radiator mounting brackets P/N SUM-380100. I used the stock tabs for the FC oil cooler to mount the brackets. I fabricated a cross bar joining the 2 sided with just a piece of flat bar stock and mounted the brackets on the cross bar. The brackets need to be bent a little down to make them angle level so the radiator sits even. and on the top I mounted the brackets to the stock radiator support. I also used a set of stock Camaro radiator hoses. I splurged and bought a beautiful summit radiator cap.
Costs: Radiator $159.99, Brackets 16.95, And cap, 14.95 all plus shipping
http://www.summitracing.com/parts/SUM-380100/
http://www.summitracing.com/parts/SUM-380328/
http://www.summitracing.com/parts/SUM-380160/

::Accessory Drive::
     As far as accessories options are limited with the LT1 due to the gear driven waterpump. I used the stock bracket with a 3rd gen alternator and since i will have A/C the stock LT1 compressor. Using the SBC mounts you will need to file down the rear tab on the compressors rear bracket to fit. Since i dont have power steering in this car I ordered a power steering delete from PSC motor sports P/N MB31K. Also the 3rd gen alternator needs to use the LT1 alternator serpentine pulley. I removed the pully from the lt1 alternator and had to have it machined down on the inside because it is to thick and does not let the bolt go on. It was $25 to have it machined and since I had both alternators i did not have to buy an alt. I also had to cut a tab on the adjuster tab on the alternator to allow bolt to go through since the 3rd gen alt is a tad shorter.
Cost: PSC Power steer delete $55 shipped, Misc Machining $25
http://www.pscmotorsports.com/-PK1500LT1F1-94-95-LT1-F-Body-High-Performance-Pump-Kit.html

::Exhaust::
     I will be using a set of edelbrock carb legal headers even though im plugging the egr passages. The exhaust is almost a perfect fit only place it contacts is on the drivers side the tip of the steering shaft bolt hits it. Nothing a hammer cant fix, I dented it flat at that spot and fit like a glove. The y pipe under the oil pan cleared everything.
They are expensive but they came with the engine others may have better alternatives but this worked out for me. they are similar to these.
http://www.jegs.com/i/Edelbrock/350/68942/10002/-1?CT=999
« Last Edit: May 16, 2010, 11:37:31 AM by RX7Driver4Life »
93 LS1/T56 FD RX-7

Offline RX7Driver4Life

Re: Official LT1/FC Swap FAQ.
« Reply #2 on: May 16, 2010, 06:53:08 PM »
::Oil Pan Clearance::     
     Granny's swap kit with the LT1 will not clear the LT1 oil pan it will rest on the steering rack. You can add some washers to the motor mounts where they meet the engine, or you can dent in the oil pan around the area. The latter is recommended since too much denting in can cause the pan to hit the counter weight on the crank.

     I realized this after mounting the engine and i remember having read it on Matt's  LT1 page but did not do it in the excitement of installing the engine and had to suffer later to clear the oil pan.
93 LS1/T56 FD RX-7

Offline RX7Driver4Life

Re: Official LT1/FC Swap FAQ.
« Reply #3 on: May 17, 2010, 12:23:27 PM »
Feel free to add and useful information can someone chime in on a throttle cable setup.
93 LS1/T56 FD RX-7

Offline digitalsolo

Re: Official LT1/FC Swap FAQ.
« Reply #4 on: May 17, 2010, 12:55:49 PM »
I would expect the same cable we use on the LS1 swaps should work with a little effort, 1998 Non-traction control LS1 F-Body cable.   Might be a little long though.

I would also expect the stock TII cable could be made to work as well, though it may need modded for more tension.
Blake MF'ing McBride
1988 Mazda RX7 - Turbo LS1/T56/ProEFI/8.8/Not Slow...   sold.
1965 Mustang Coupe - TT Coyote, TR6060, modern brakes/suspension...
2007 Aston Martin V8 Vantage - Gen V LT4/TR6060, upper/lower pullies, headers, tune.
2021 Tesla Model 3 Performance - Stock...ish.

Offline RX7V8Builder

Re: Official LT1/FC Swap FAQ.
« Reply #5 on: May 17, 2010, 01:13:02 PM »
I used a 4th Gen  FBody non traction control Throttle cable in my swap.
It was a direct fit. 
The only mod necessary was backing out the throttle stop a bit and bending the pedal for the Throttle Body to open 100% at WOT.
« Last Edit: May 17, 2010, 01:15:07 PM by RX7V8Builder »

'87 Base Model FC
LT1 385 LE ported DART heads_ T56 
8.8 IRS
Ricardo

Offline RX7V8Builder

Grannys Headers with Lt1/T56
« Reply #6 on: May 17, 2010, 01:49:16 PM »
I had GSS headers coated by Jet Hot.  They have 1 3/4" primaries and 3"collectors:

Fitment issues I found were mainly at the passenger side close to the collector.  Had to "massage" the firewall in that area a bit, but nothing major.

For the drivers side I used Thermo Tec Heat shield and a metal deflector for the fuel and brake lines.


No problem with LT1 pull style slave cylinder.  There seems to be some confusion regarding this subject.


« Last Edit: May 17, 2010, 01:51:37 PM by RX7V8Builder »

'87 Base Model FC
LT1 385 LE ported DART heads_ T56 
8.8 IRS
Ricardo

Offline RX7Driver4Life

Re: Official LT1/FC Swap FAQ.
« Reply #7 on: May 17, 2010, 04:19:31 PM »
::3rd Gen RX-7 Alt On LT1::
     I decided since i had this 3rd gen alternator I bought a while back I might as well use it for the swap seeing as the LT1 alternator supposedly hits the hood. here is what I did......

Had to have the LT1 pulley machined down on the inside since it was to thick to allow the nut to go on it.


Here it is on the shaft so you can see why it would not have bolted on otherwise.


The back of the alternator pulley is to thin so the pulley hit the alt housing nothing a small washer cant fix.
Before

After


Here is the final product.


Here you can see the tab I cut into the alternator adjuster.

93 LS1/T56 FD RX-7

Offline RX7Driver4Life

Re: Official LT1/FC Swap FAQ.
« Reply #8 on: May 17, 2010, 04:26:14 PM »
Here is my willwood master cylinder. was really easy to bleed and you just need to pump the slave to get the air up to the master then re bleed the master. The firewall adapter and there banjo bolt kit makes everything easy.


93 LS1/T56 FD RX-7

Offline RX7Driver4Life

Re: Official LT1/FC Swap FAQ.
« Reply #9 on: May 28, 2010, 11:55:49 AM »
Memo to using the 3rd gen alternator you need to massage the bracing on the hood a little bit since it contacted with it. I thought it would not but seeing as it is a 3rd gen alt its taller than a 2nd gen alt.
93 LS1/T56 FD RX-7

Offline RX7Driver4Life

Re: Official LT1/FC Swap FAQ.
« Reply #10 on: May 28, 2010, 01:15:31 PM »
The throttle cable was probably the easiest part of this swap. I used the stock LT1 throttle cable bracket and cut off the little tab on the inside of it. Then i used a Stock TII throttle cable and adjusted it so the rubber grommet was all the way back on the screw and it was a perfect fit.

I outlined the brackets figure in white to contrast since it is hard to see and you need to remove all the material in the blue circle.
93 LS1/T56 FD RX-7

Offline gadzooks

  • Supporting Member
  • Launching!
  • Posts: 1347
  • Got Torque?
  • View Gallery
    • View Profile
Re: Official LT1/FC Swap FAQ.
« Reply #11 on: May 28, 2010, 05:25:26 PM »
I'll chime in with more later, but for the throttle cable, I used one for a '95 F-body(requires a little bending of the top part of the pedal to take out the slack), and I've seen a stock TII one used as well
1987 Base/Light Weight with '95 Firebird LT1/T5

Offline mattster03

Re: Official LT1/FC Swap FAQ.
« Reply #12 on: May 29, 2010, 05:08:52 PM »
Well here we go...

I used the Granny?s Speed Shop engine cradle and transmission mount.  Here?s a picture of it installed on my stock subframe; it is important to keep the bolts which mount the new frame to the existing loose until the engine is mounted to the sub frame as this allows additional flex for the very tight fitment that Granny?s provides.  It is also important to mount the engine to the REAR holes on the subframe (provided you will be removing or relocating the EGR valve from the back of the intake manifold), they are approximately 1? further back.  The front holes are for old school SBC?s which have distributors on the rear of the engine.


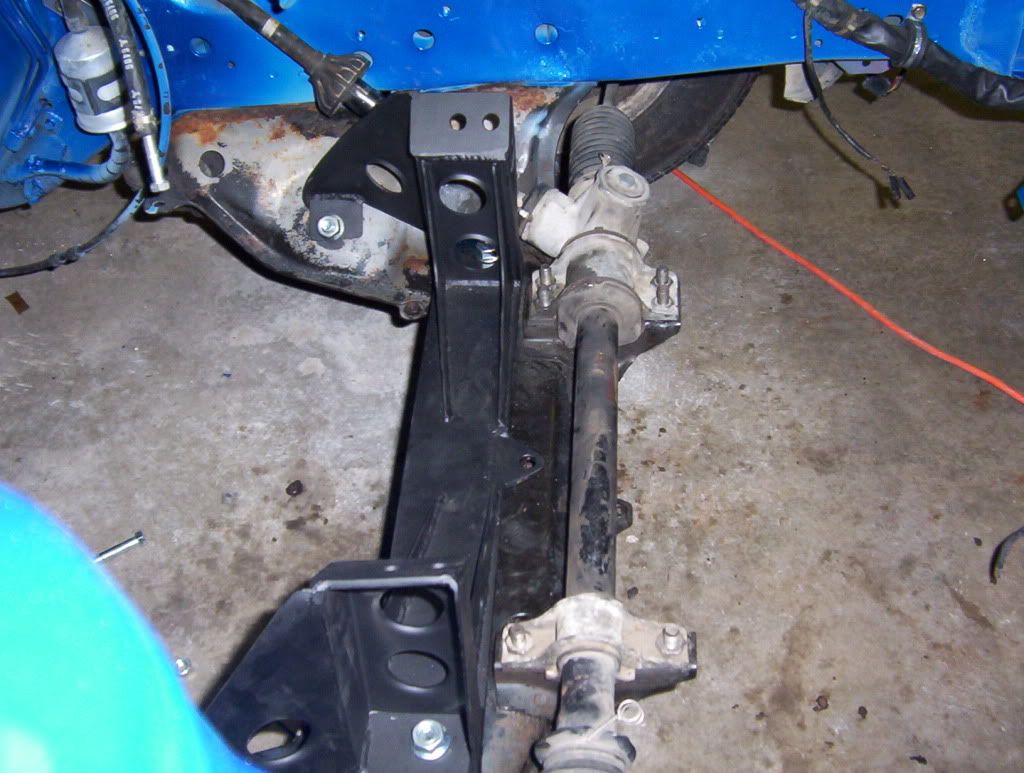
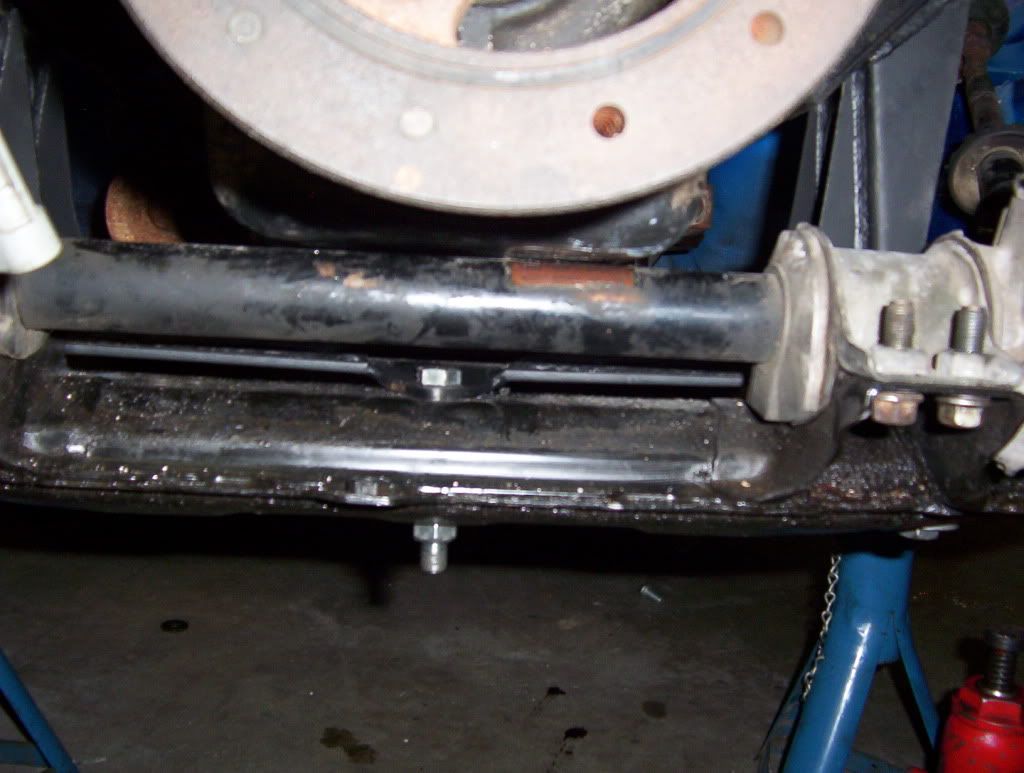
I chose to use a manual steering rack; they are readily available from www.car-parts.com .  Although I believe they are not necessary for fitment, I found the pan to rack clearance to be extremely tight with the manual rack... If it is too close, a flat washer can be added to increase the clearance.  Some benefits to using a manual rack include quicker steering ratio, lighter weight, & one less system to have to worry about during the swap.


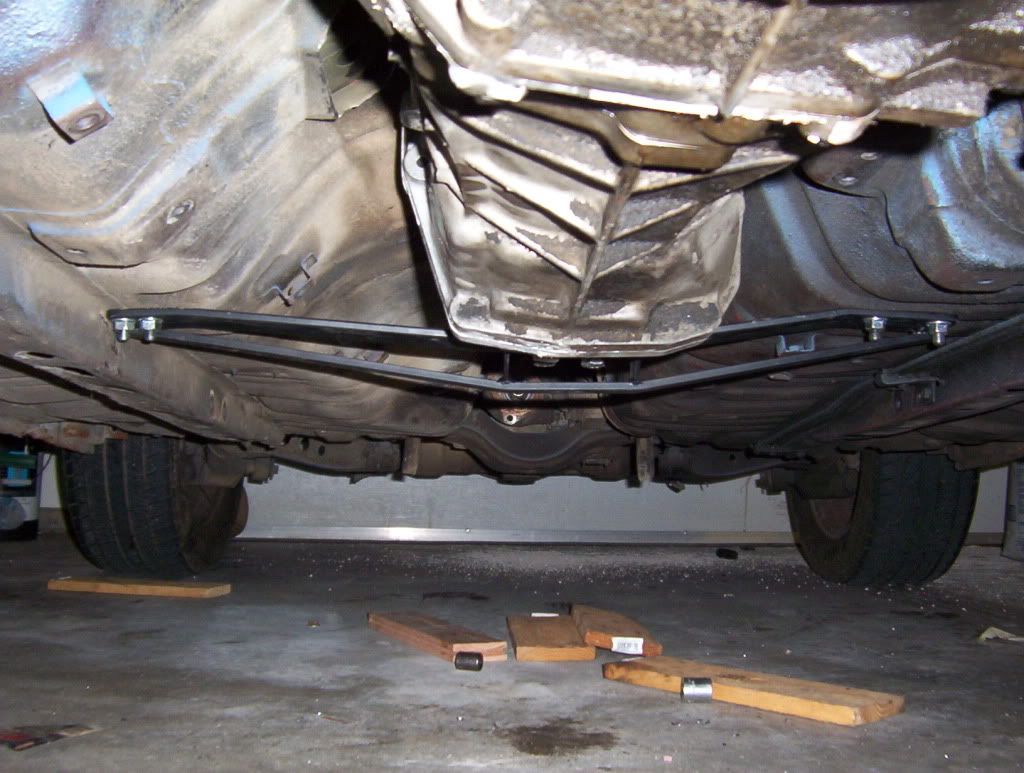
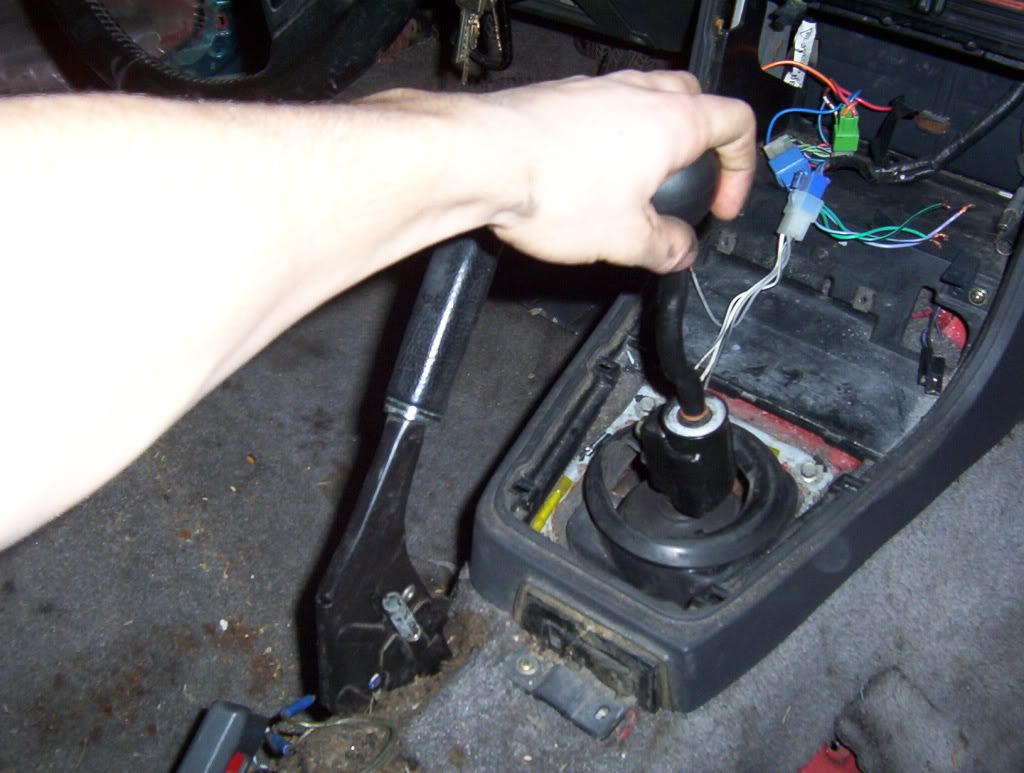
Here is a picture of the transmission mount installed.  It uses 3 bolts which pass through the floor pan of the car on each side? this requires drilling through the floor pan.  Although this may seem like a pain, I have found this method to be way stronger than other methods.  The carpet does not have to be removed to drill the holes; it can simply be pulled back from the sides.  The placement puts the shifter at a perfectly centered location in the interior.


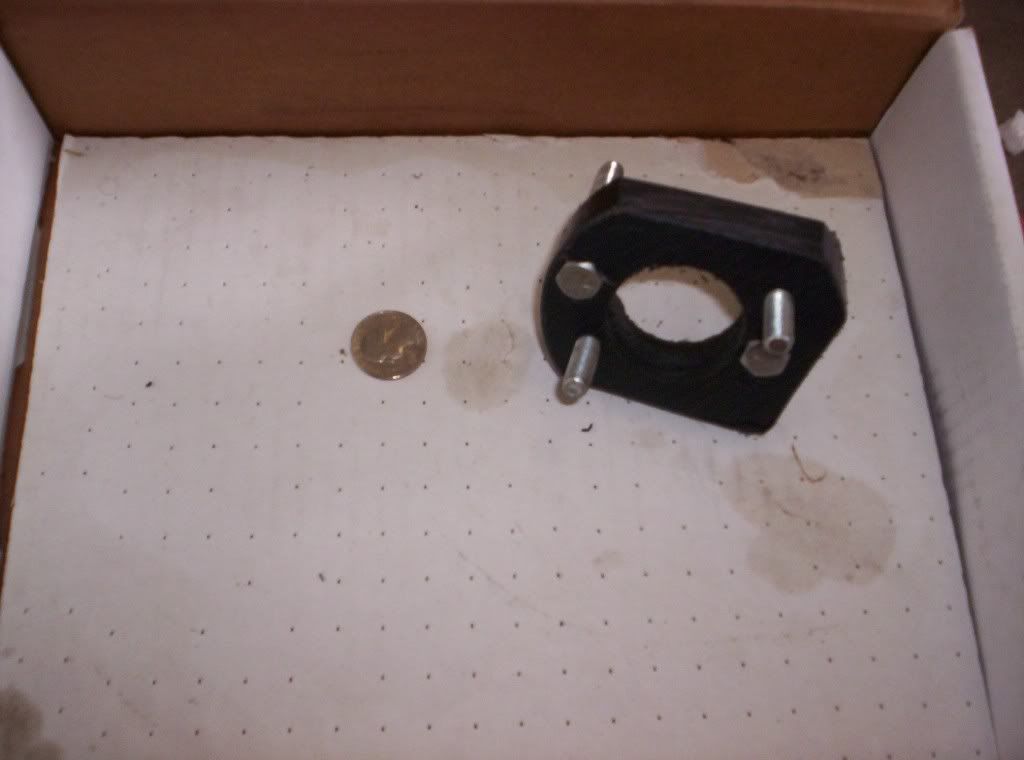
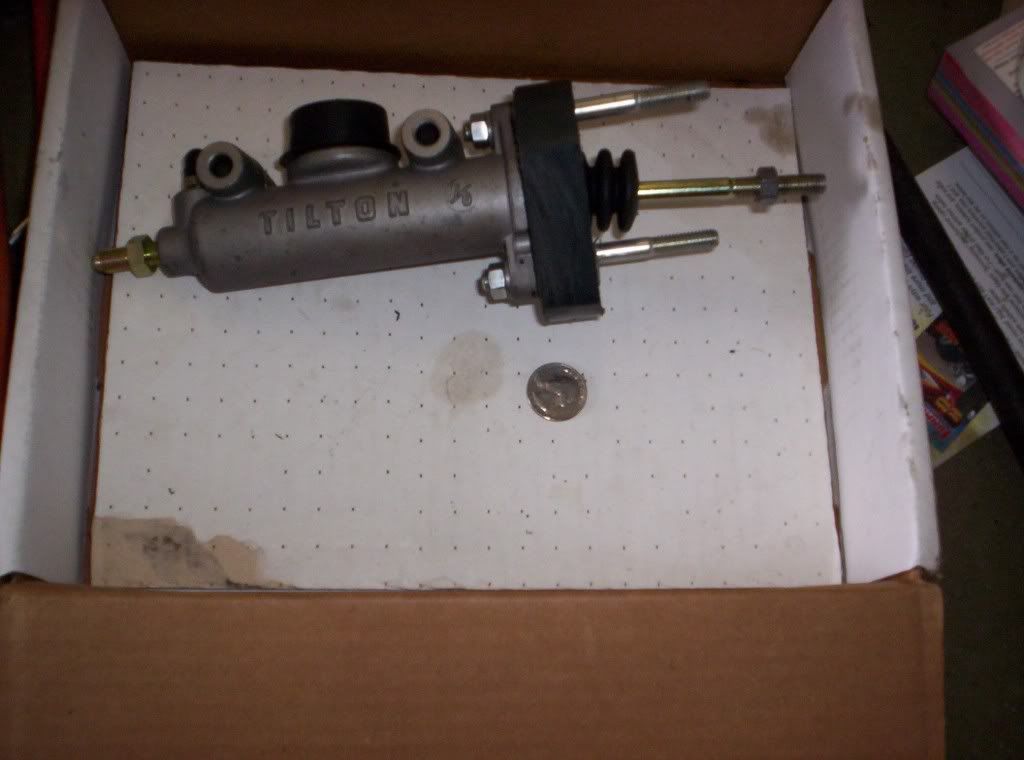
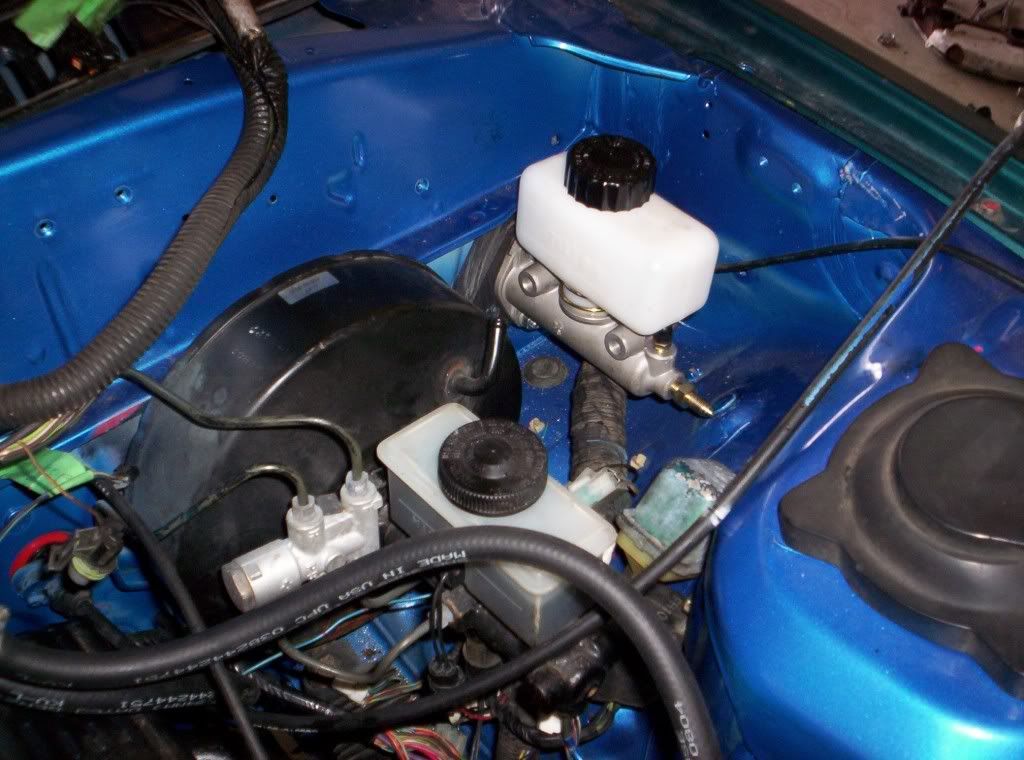
The T56 transmission uses a push-style hydraulic clutch with is very similar to the stock RX-7 setup.  Because the stock RX7 master will not displace enough fluid to disengage the clutch, I chose to use a 7/8? master cylinder from Tilton (wildwood, USBrake, etc. all work fine).  The stock Mazda master cylinder has mounting holes at 2 & 8 o?clock whereas the aftermarket master cylinder uses holes at 12 & 6 o?clock; I chose to build a custom bracket to use the existing holes and keep the master cylinder upright.  Here?s a picture of the bracket I made from a 1? thick piece of plastic material.  I believe Hinson Supercars now sells something similar.


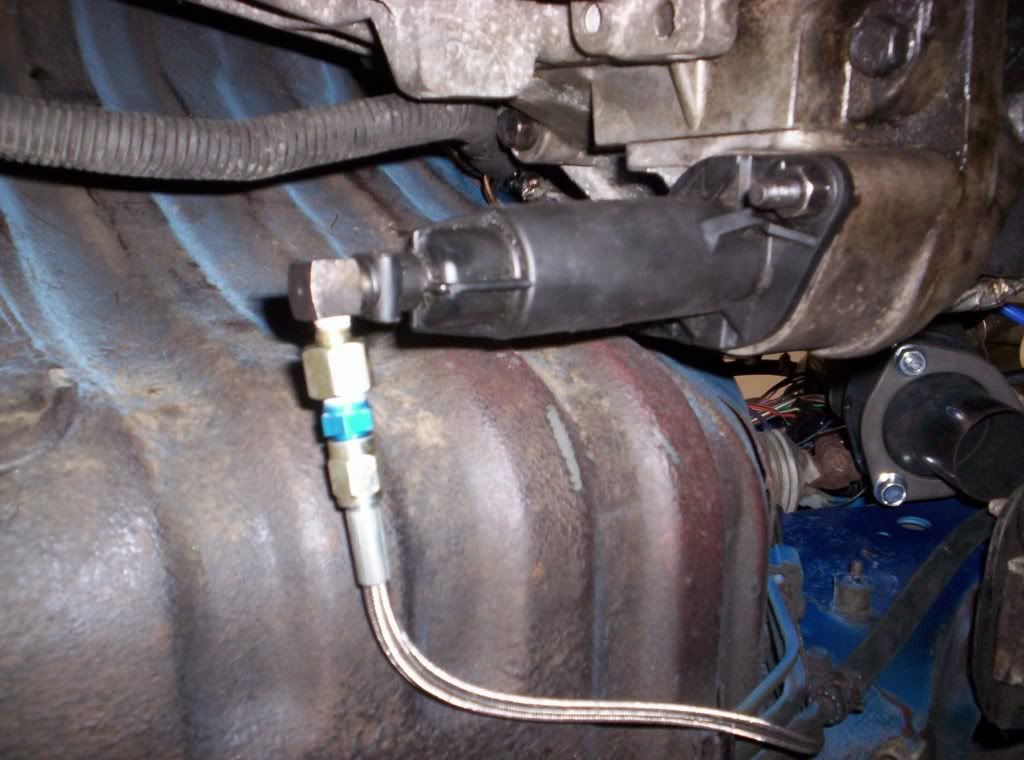
A clutch line can be fabricated using a 36? long -3AN steel braided hose with a -3AN straight fitting for the slave cylinder end and a -3AN 90* fitting for the master cylinder end.  The LT1-style T56 slave cylinder uses a special ?roll pin? fitting that is now available through Russel Performance, part #640281 , this connects to the -3AN end of the hose and plugs into the slave cylinder.


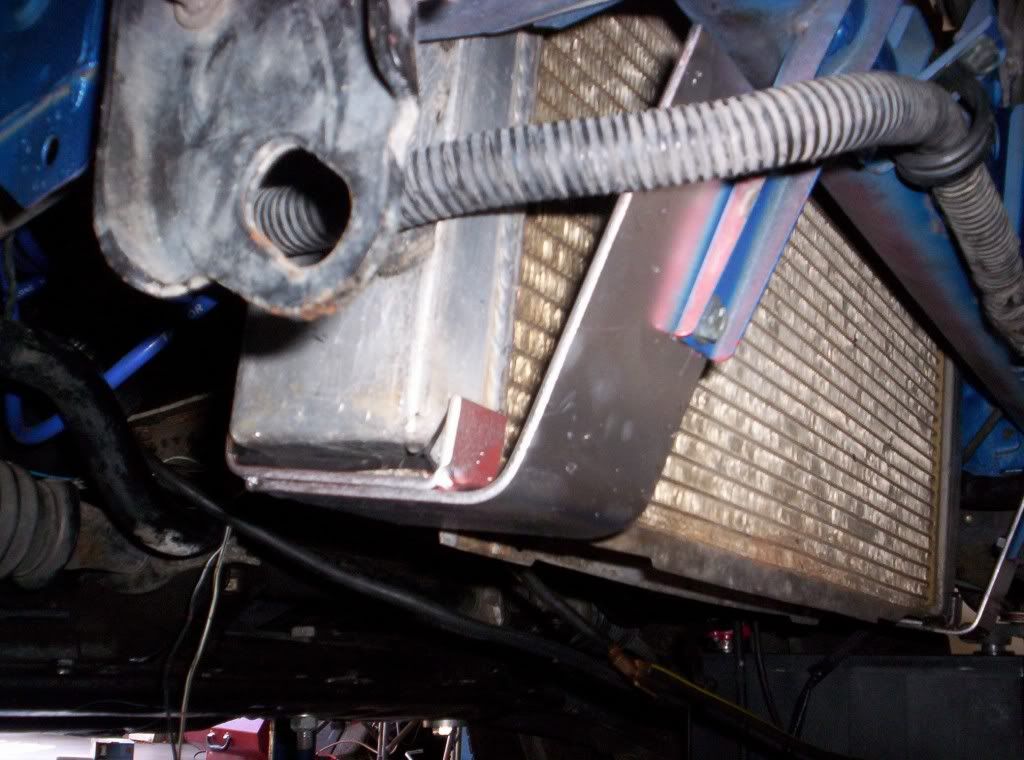
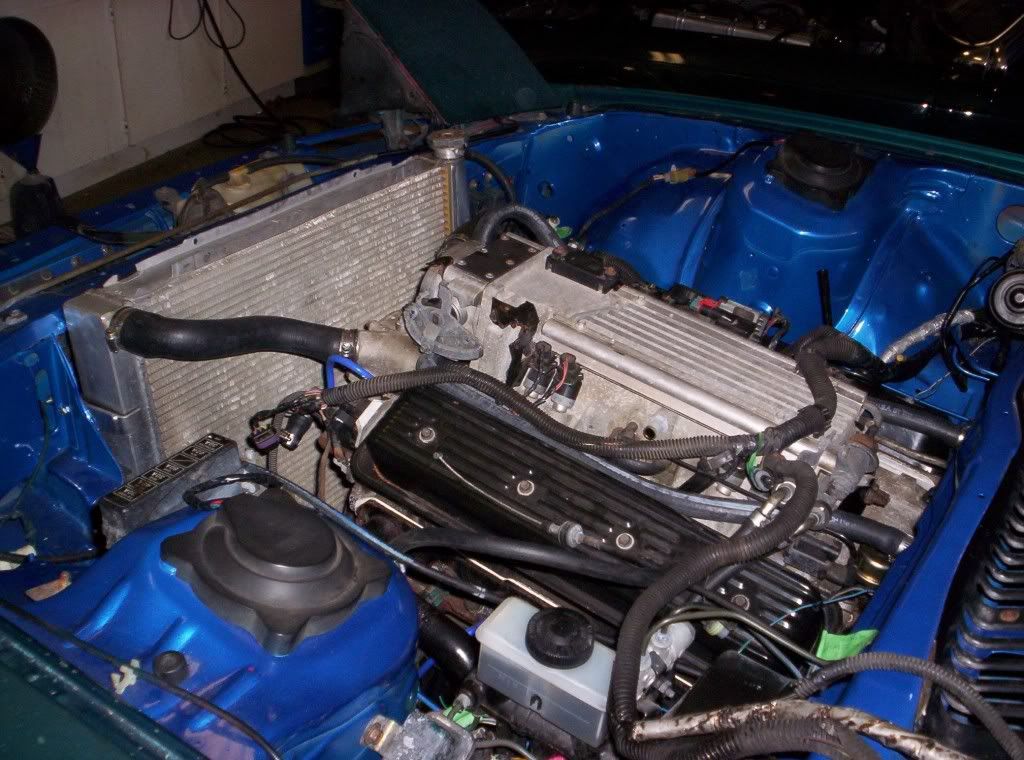
There are so many different ways to skin the cat when it comes to cooling.  I chose to go the route of buying an aftermarket radiator and fabricating my own mounts.  I purchased a 26?x19? three core radiator from Howe Racing? this was about the biggest radiator I could fit between the frame rails.  It required cutting two very small flaps of metal near the headlight structure.


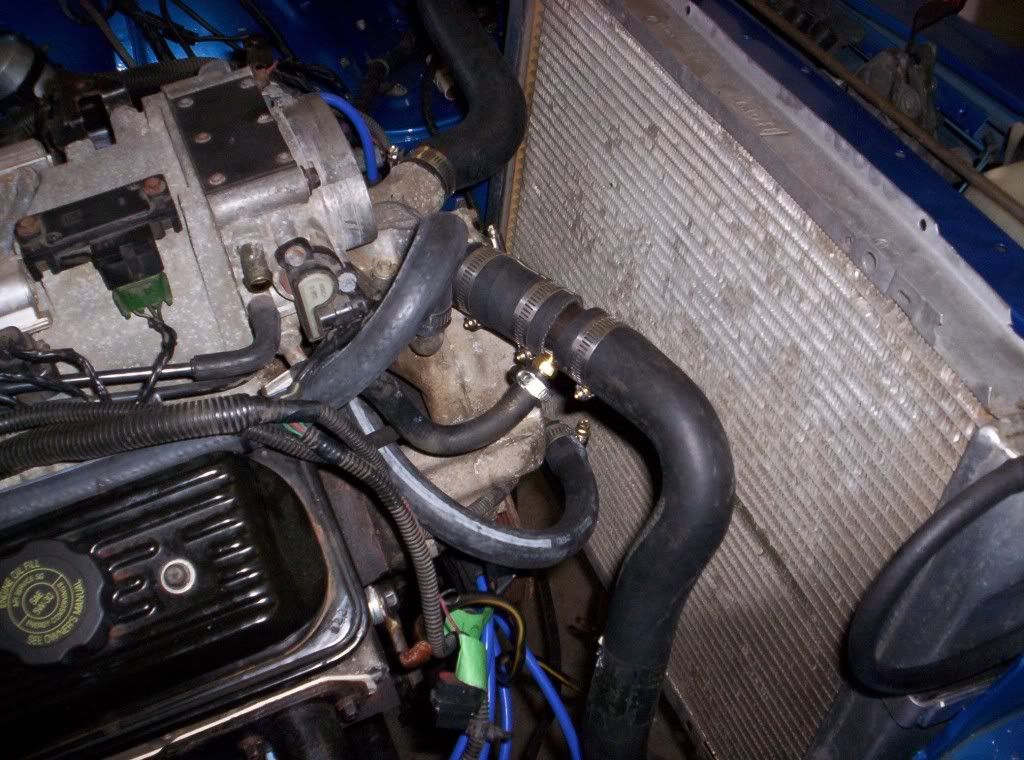
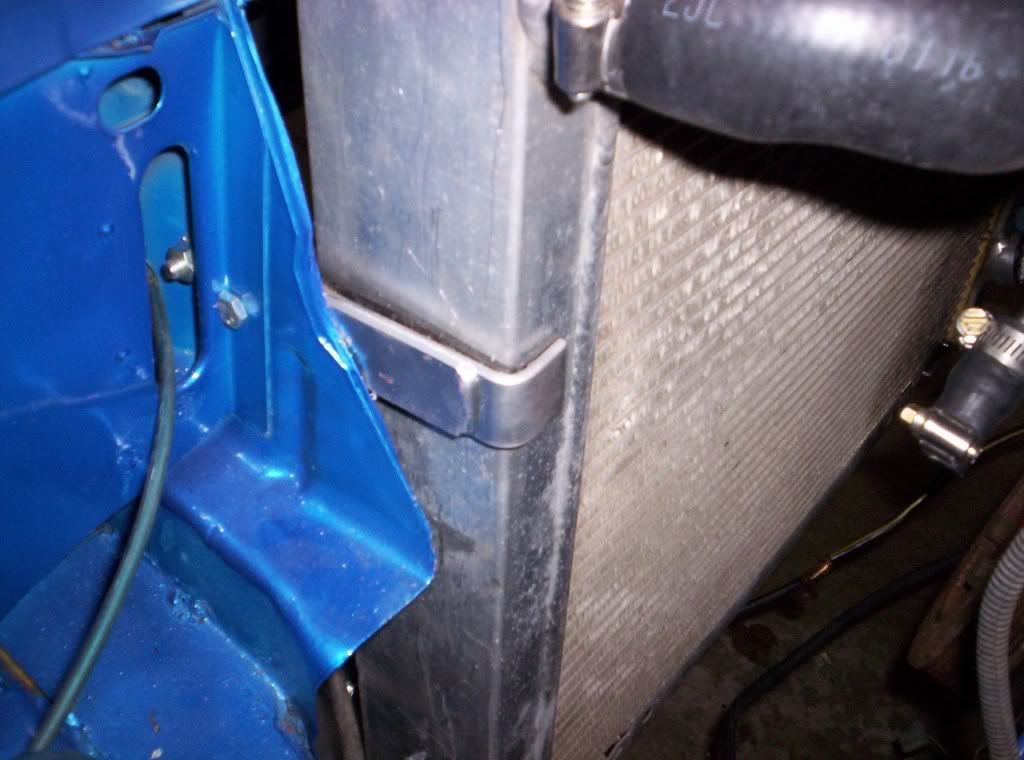
I fabricated brackets which support the radiator from the bottom with pieces of flat bar which when bent and drilled to hold the radiator in an upright position.  I lined the brackets with some rubber so that vibrations would not allow the steel to wear into the soft aluminum radiator.


« Last Edit: May 31, 2010, 01:56:36 PM by mattster03 »
Current Car: 1993 Mazda RX7 Touring, LS1/T56, Stock Stock Stock

1993 Mazda RX7 R1, LS1/T56, EPS 230/238, TSP Ported heads
10.826 @ 128 , 1.53 60' - SOLD

Feature Article - http://www.importmeet.com/blog/2012/03/29/best-of-both-worlds-v8rx7guys-ls1-swapped-1993-mazda-rx-7/
Swap Info - http://www.cardomain.com/ride/2801662

1986 Mazda RX7 GXL, LT1/T56 "Retired"
Swap Info - http://www.cardomain.com/ride/641869

Offline RX7Driver4Life

Re: Official LT1/FC Swap FAQ.
« Reply #13 on: May 31, 2010, 06:55:41 PM »
Anyone care to add bits for exhaust.

I fitted the edelbrock carb legal headers for the fbody but the y pipe hits the frame rail so im going to have to go another route for exhaust.
93 LS1/T56 FD RX-7

Offline RX7Driver4Life

Re: Official LT1/FC Swap FAQ.
« Reply #14 on: June 03, 2010, 10:25:21 AM »
Hey Matt What radiator hoses did you use?
93 LS1/T56 FD RX-7