April 25, 2024, 12:29:33 AM

Author Topic: Autox + road course FD LS1 swap  (Read 62204 times)

Offline markfluko

Autox + road course FD LS1 swap
« on: January 19, 2013, 02:38:57 AM »
My name is Mark and I bought this FD about 9 months ago, and have been taking pictures of its build progress up until now where I decided to finally post a build thread. I use this forum for a tool all the time, so hopefully my thread can help someone else out also. My car is a 93 FD touring in Montego blue. I bought the car as a roller and with no headlights or front bumper. It had been sitting at a storage unit outside and inside some times since 2003, so I was expecting it to be kind of dirty. It was. It only has 26k miles on it. Here are a bunch of pics of it the night I brought it back.

My overall goals for the car are about an 80% track car with 20% street. Sooner rather than later I would like it to be more of a track car for road racing and hopefully Circuit of the Americas if the track days open up more. For now I am keeping the interior, but have made the dash ready for a full roll cage in the future. I am redoing the entire electric chassis harness and relocating the ABS computer and ABS unit.

I am using Samberg mounting equipment and radiator with the bumpsteer kit.

Some of these pictures may be out of order.


You can see how dirty it was on the door panel, carpet, everywhere.


I have a ton of clean up photos, but probably don't need to post them all, but this thing had a lot of leaves and debris just building up from over the years. So I needed to strip it all the way down.


ABS removed


For my engine, I am using a 2000 LS1 from a Camaro(LS6 Block) that was in my S14


« Last Edit: June 07, 2014, 11:07:40 PM by markfluko »

Offline markfluko

Re: Typical FD LS1 swap
« Reply #1 on: January 19, 2013, 02:44:21 AM »
Power washing wheel wells. The rotors are extremely rusted.


Rubberized undecoating sprayed on


Offline markfluko

Re: Typical FD LS1 swap
« Reply #2 on: January 19, 2013, 02:58:15 AM »
Replacing front wheel bearing with TIMKEN unit and new OEM spindle nut and ARP studs. Also new slotted brake rotors with Hawk HP+ pads and SS lines.


Pressed out the OEM studs and pressed the ARP extended studs in.


Preparing the engine and transmission. Monster Stage 2 organic clutch, new slave, flywheel, bolts etc...


Put back together and ready to go in


Offline markfluko

Re: Typical FD LS1 swap
« Reply #3 on: January 19, 2013, 03:08:13 AM »
All pedals taken out and cleaned and painted


Welding Samberg washers for the subframe


After a whole lot of cleaning, I got the engine bay paint looking very fresh again and installed the Samberg subframe


cut out firewall lip section for future FAST 102


Putting the engine in with the help of roomate


he realized that standing in the engine bay wasn't the best idea, and had trouble getting out... haha

Engine is in!


Offline markfluko

Re: Typical FD LS1 swap
« Reply #4 on: January 19, 2013, 03:21:59 AM »
I recently finished my fuel setup and have been seeing some posts with people having questions on setting up an FD with the corvette filter. I know I had questions when I was working on my fuel setup, and with the help of this forum I was able to find information scattered in different threads.  My disclaimer is that I have not actually finished my car yet so I haven't used the setup yet, but I don't see why it shouldn't work.

I am using the stock fuel tank and use OEM hardline. I am using an in tank Aeromotive 340 stealth that I rewired to 10 gauge wiring. I am not using the charcoal canister either.

My parts list  is all from summit and is as follows:

AER-FBM1012   6AN STRAIGHT HOSE END                                                   x 7
AER-FBM4032   FITTING REUSABLE ALUMN 90DEG                                      x 1
AER-FCU0610   STARLITE HOSE 6                                                                x 1
EAR-165056ERL   ALUM TUBE ADPT -6 MALE AN TO 5                              x 4
LNG-47200   ADEL 9 16 PAK OF 10                                                          x 1
RUS-640850   EFI TO 6 AN FITTING                                                           x 1
RUS-640860   FUEL RAIL TO -6AN                                                             x 1
RUS-640940   FUEL RAIL ADAPTER FITTING                                               x 1
WIX-33737   LINE FUEL                                                                           x 1

The total comes to about $270 + shipping. I should also say that the OEM fuel rail I am using already had a -6 AN male on it, so I didn't need that connection, but if you do need that it should be just another 640860 I believe.

It shouldn't matter what intank fuel pump you use, but I rewired mine with parts from McMaster. That parts list is:

2 ft of 7304k173
2 ft of 7304k171
1 pack of 69525k17
7807k13       x  1

This was just under $20.

Here is a diagram of how everything will be laid out.


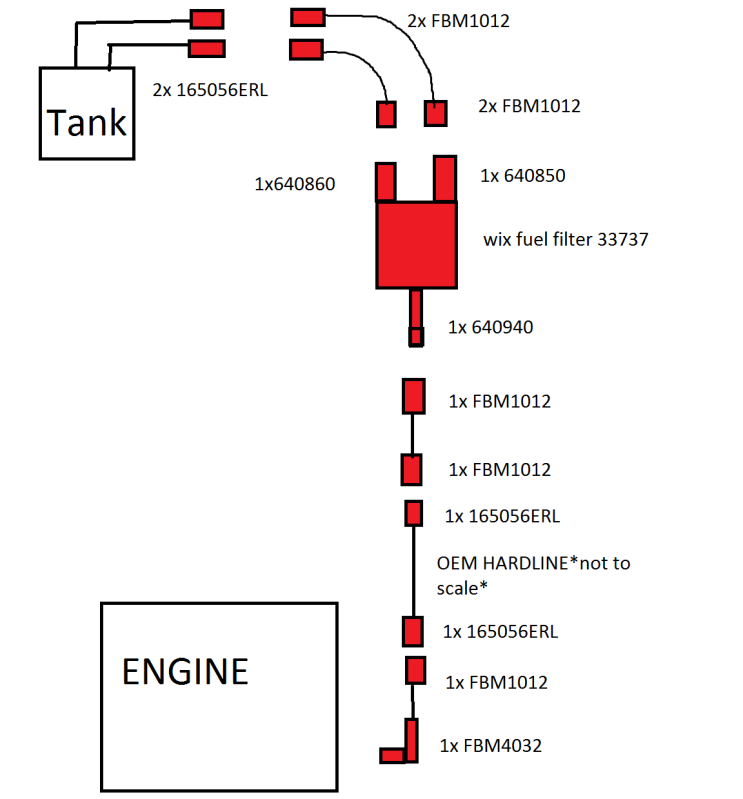
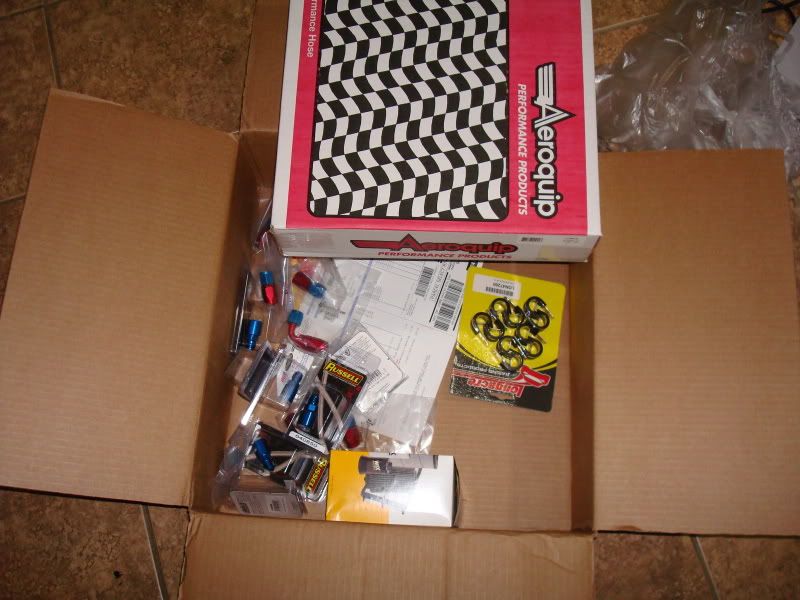
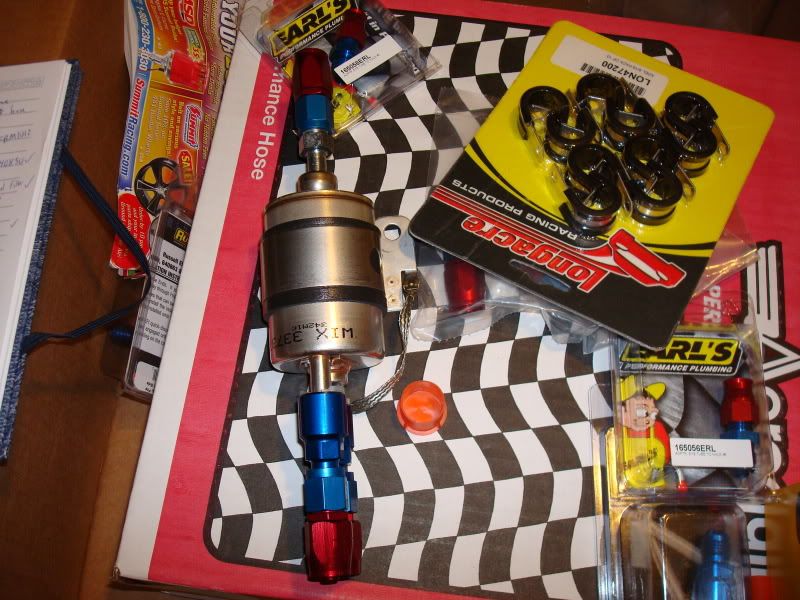
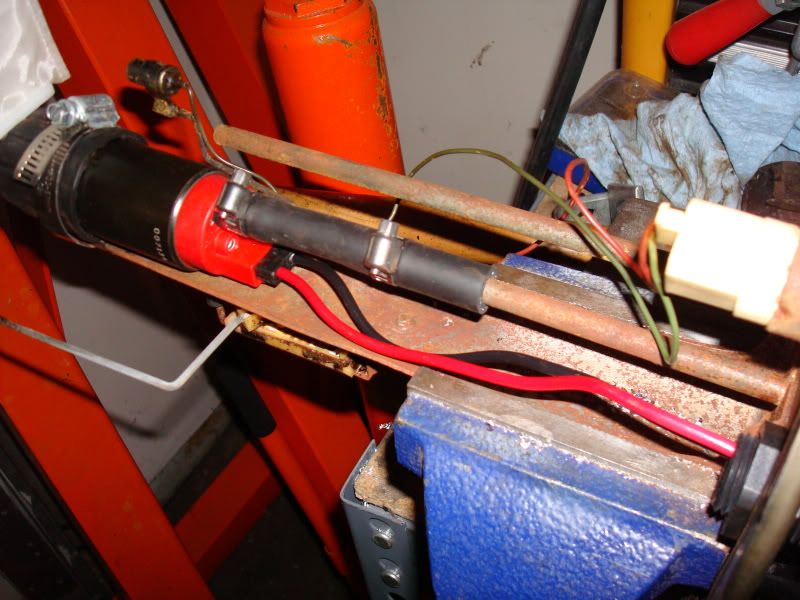
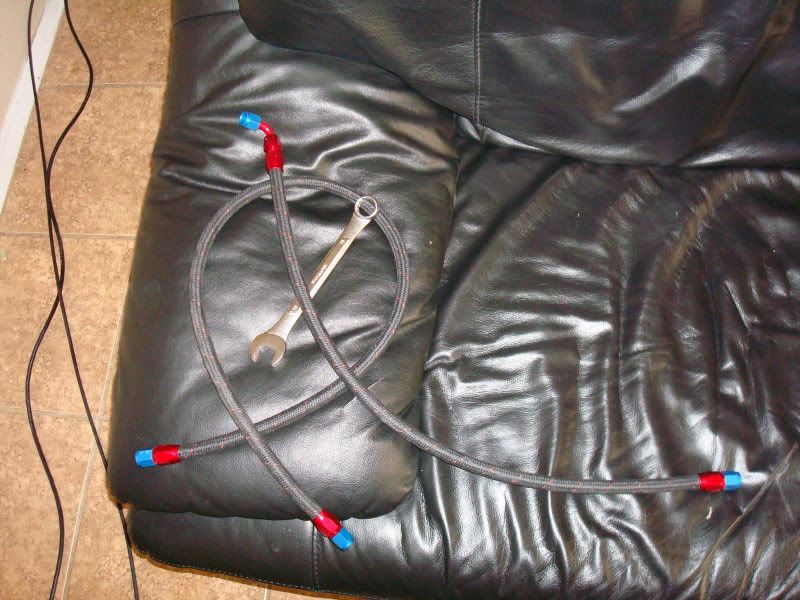
This is what it should look like when you get everything. I had about 8 inches of fuel line leftover, so be careful and don't waste any of it.


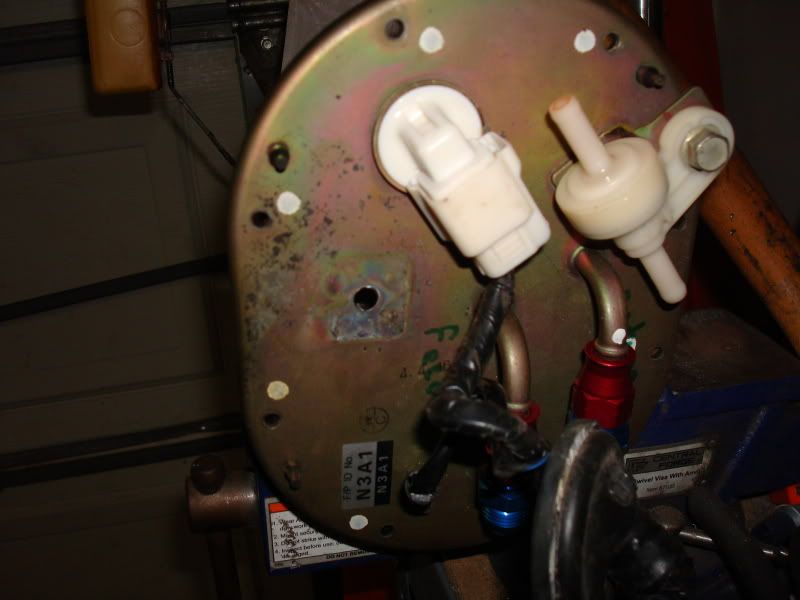
installing the fittings is easy, everything should just snap onto the FPR.


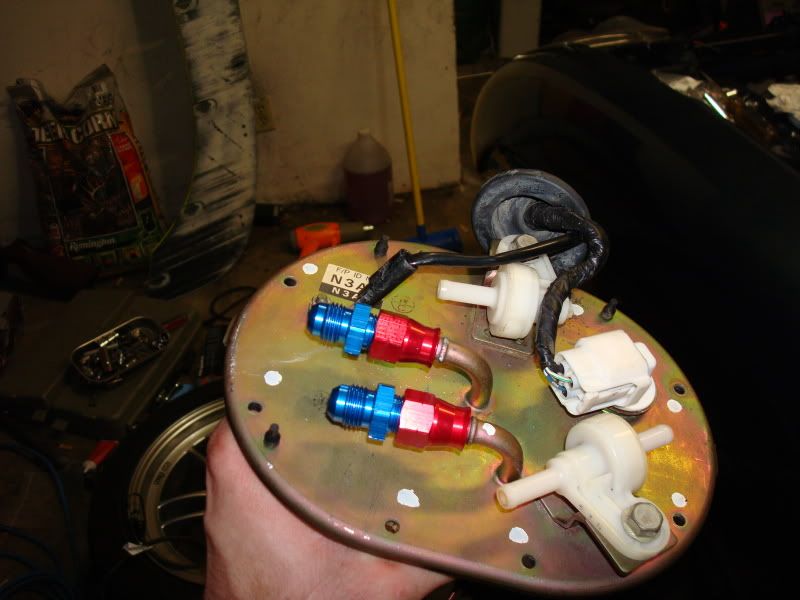
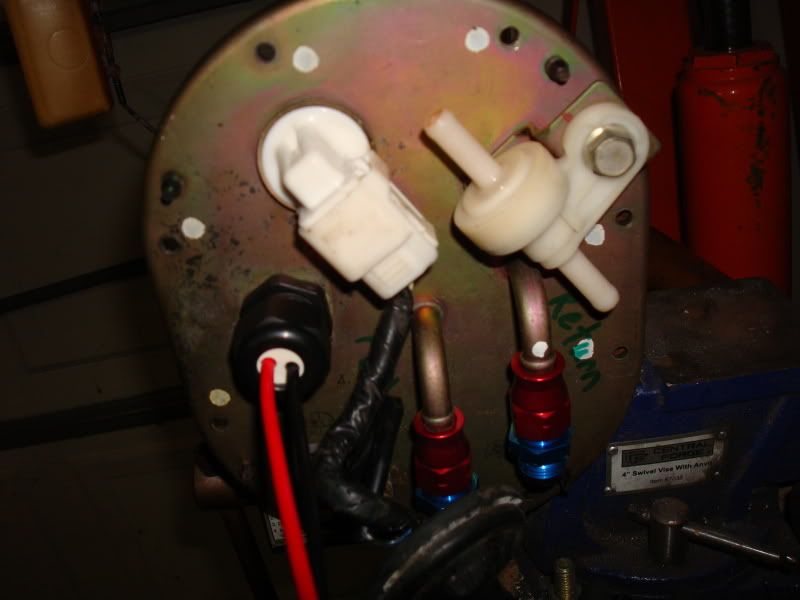
I cut the bulges off the end of the fuel tank cover and attached the fittings.


Drilled out the hole to fit the McMaster bulkhead


Bulkhead for 10 gauge wiring


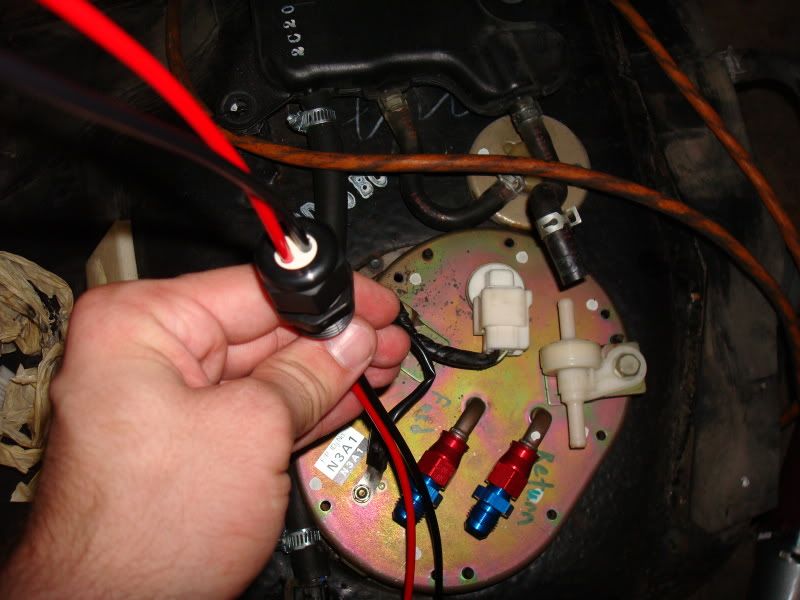
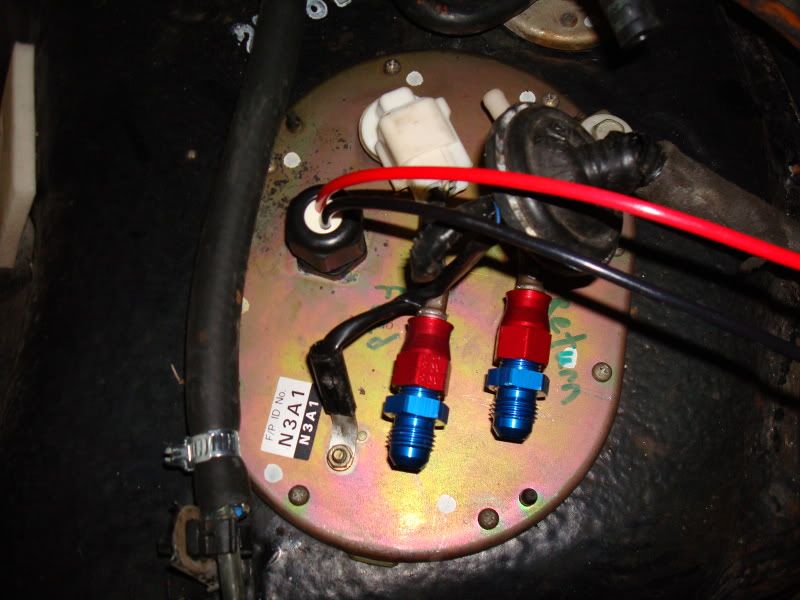
ditched the 16 gauge wiring and , installed the new wires and terminals in the plug that came with the fuel pump


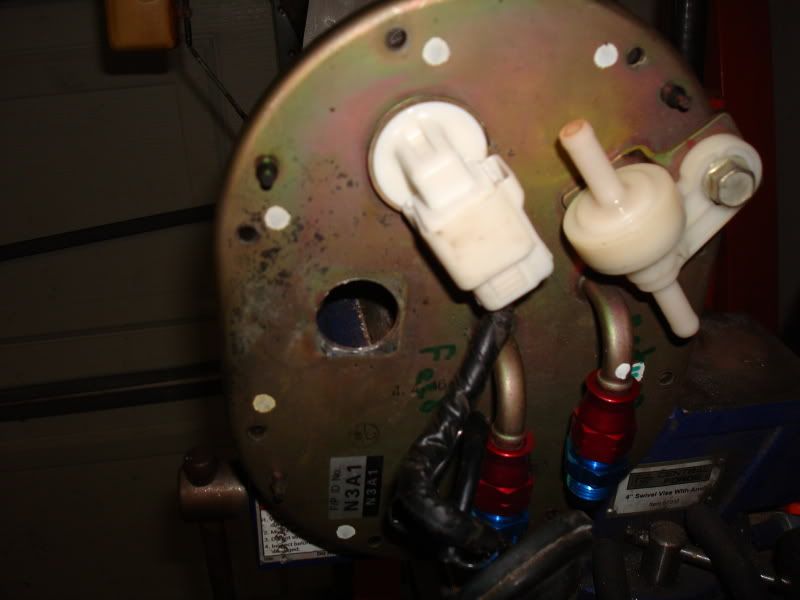
Ready to put back on the fuel tank


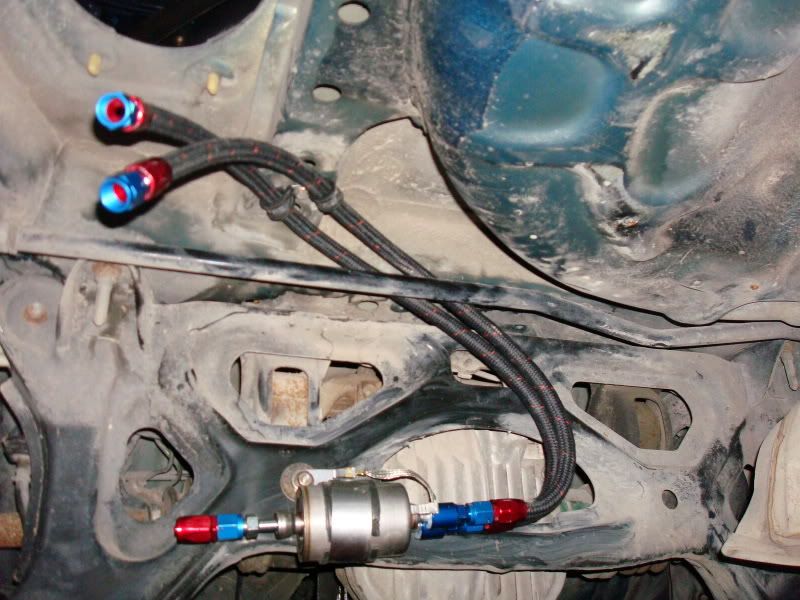
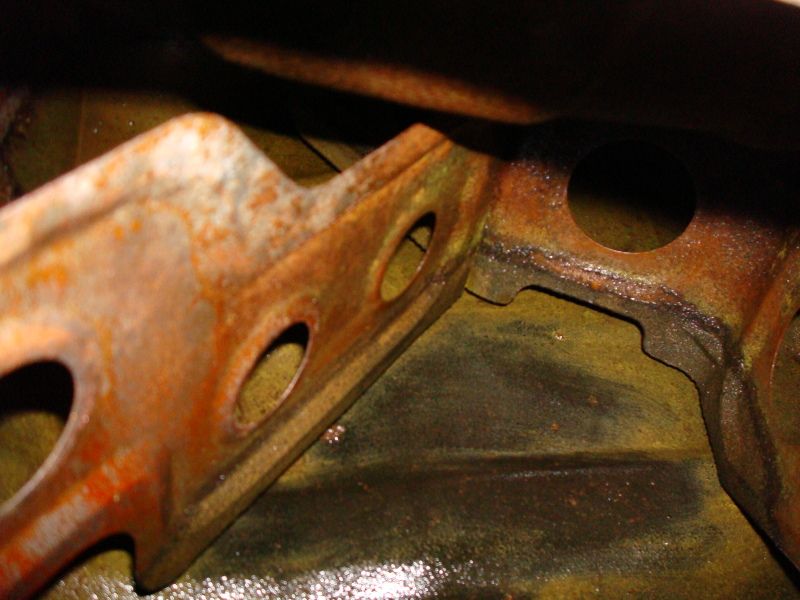
Checked area for FPR, used a bolt that is long enough to go through the hole that already exists there to mount it.


installed the feed and return side


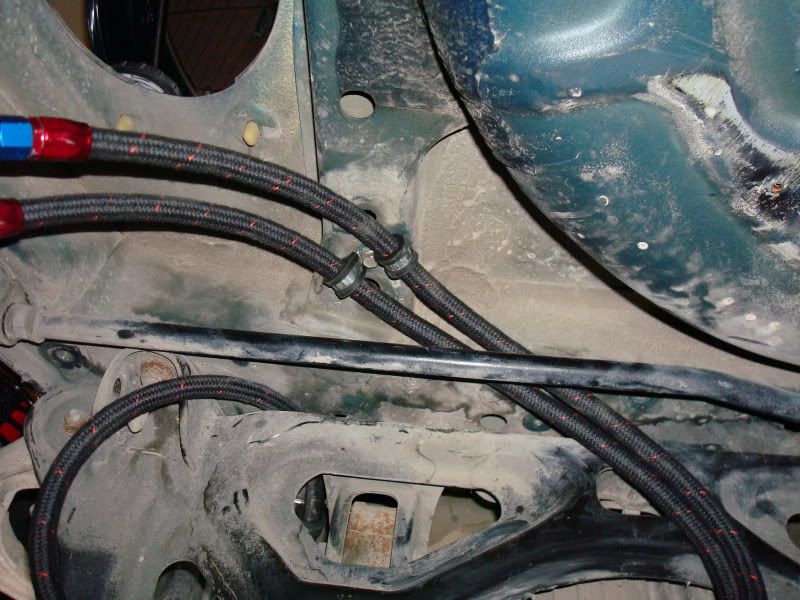
Lines made up to lead to the OEM hardline and engine


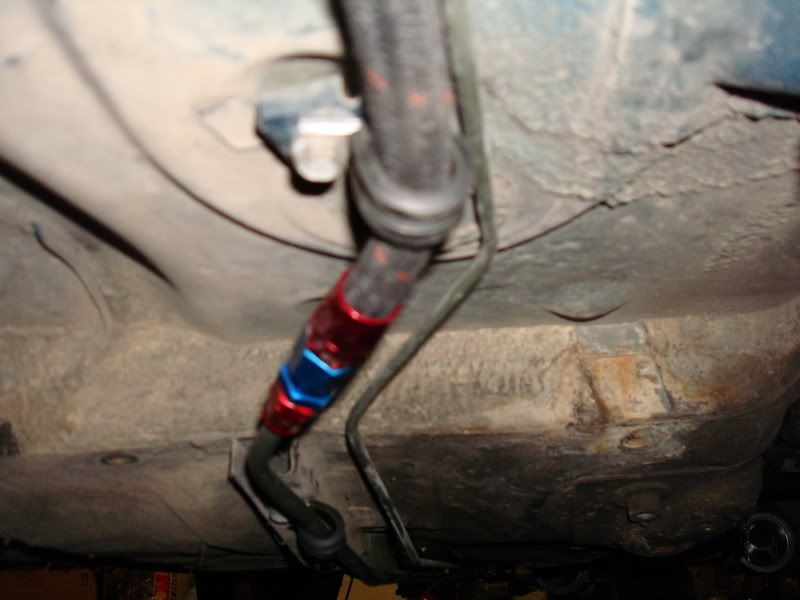
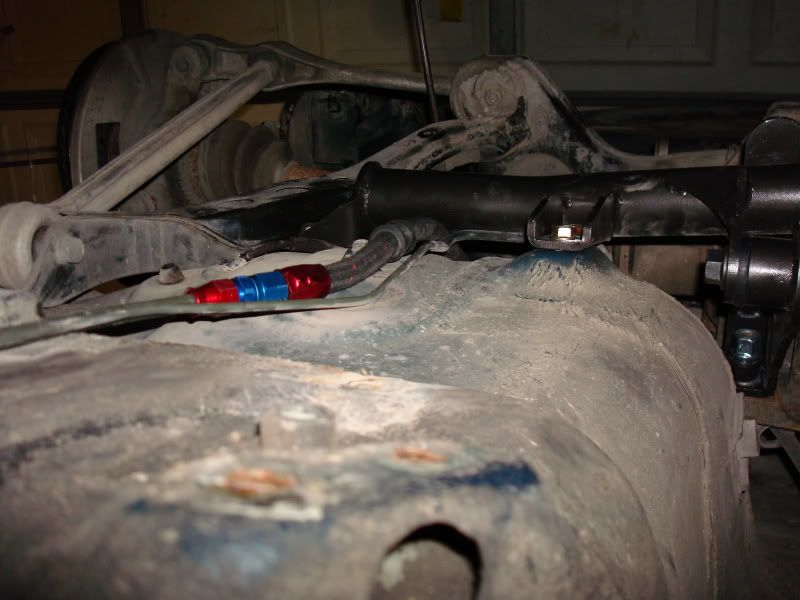
some mounting points for the fuel line clamps


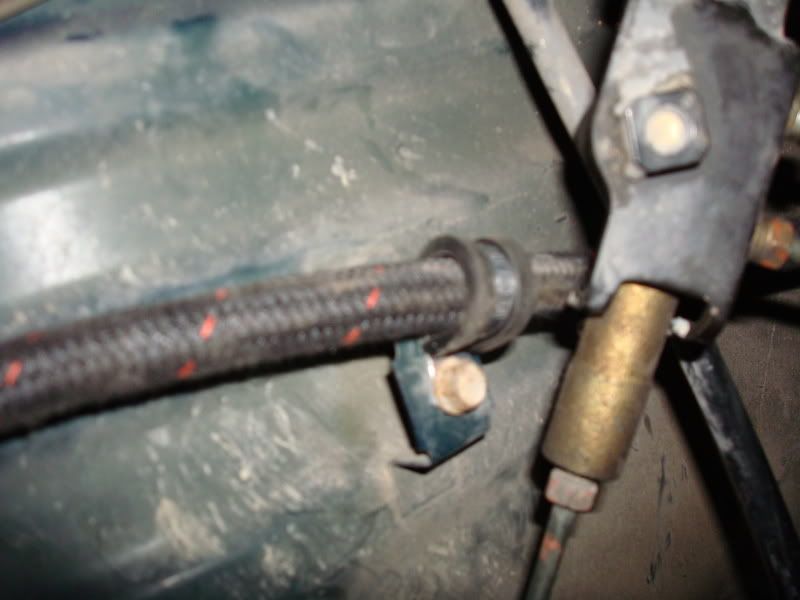
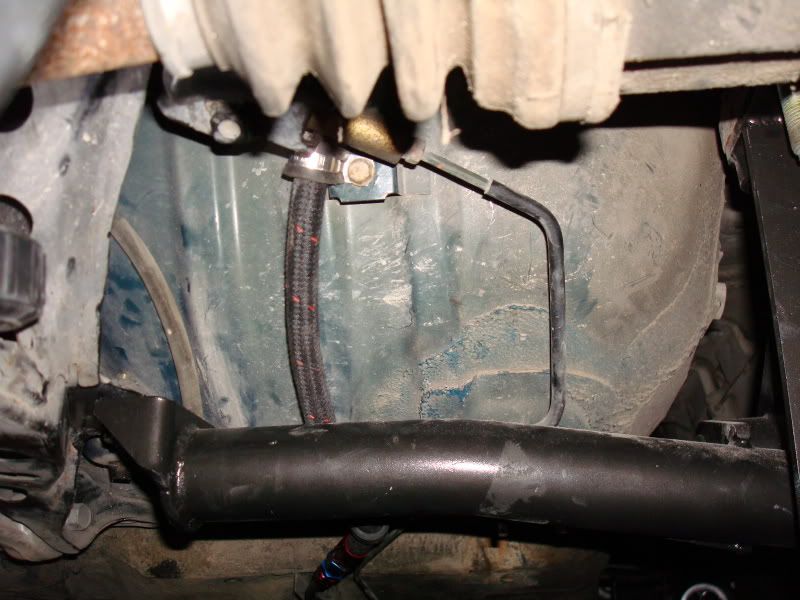
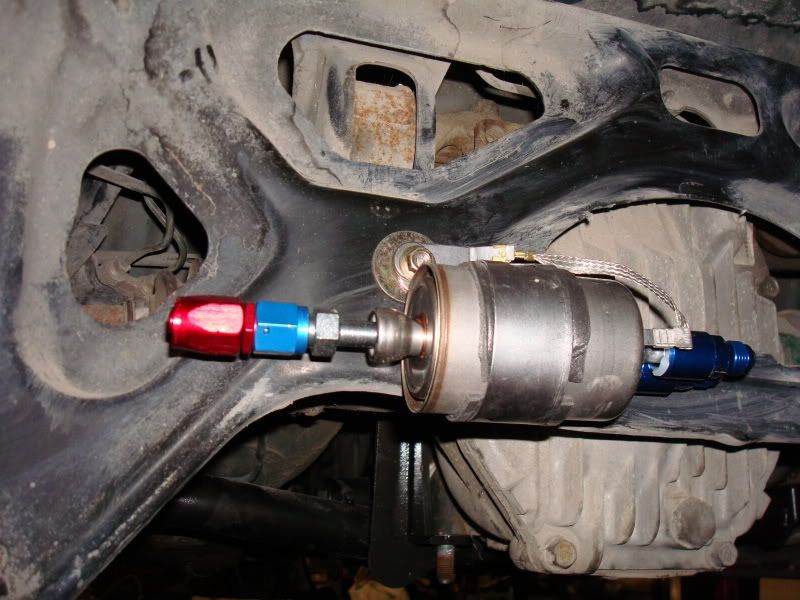
installed the fittings on the hardline and mounted


If anyone wants to add anything or has any better options to add to this then go ahead.

Added Stance GR+ coilovers. I haven't used the before and they look great and everything, but I already wish I had gotten some Ohlins. But I have heard great things about Stance and I hope they work out great.

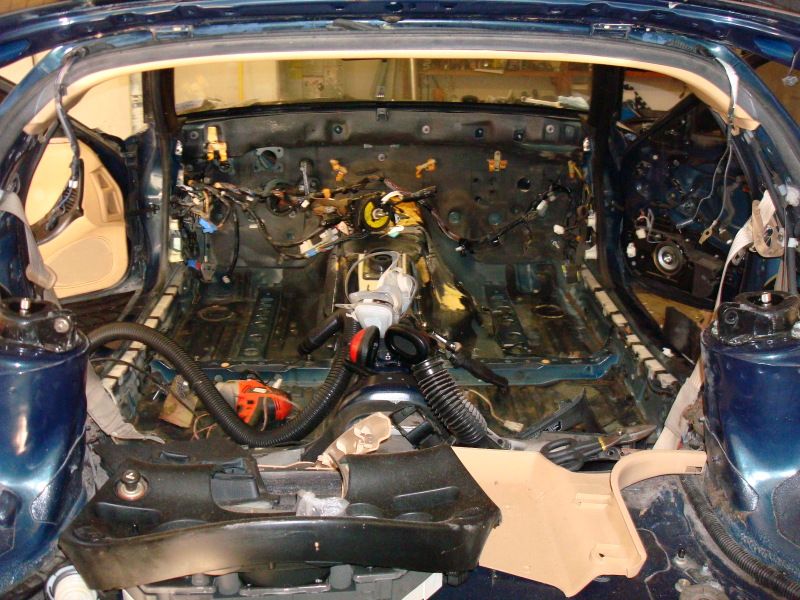
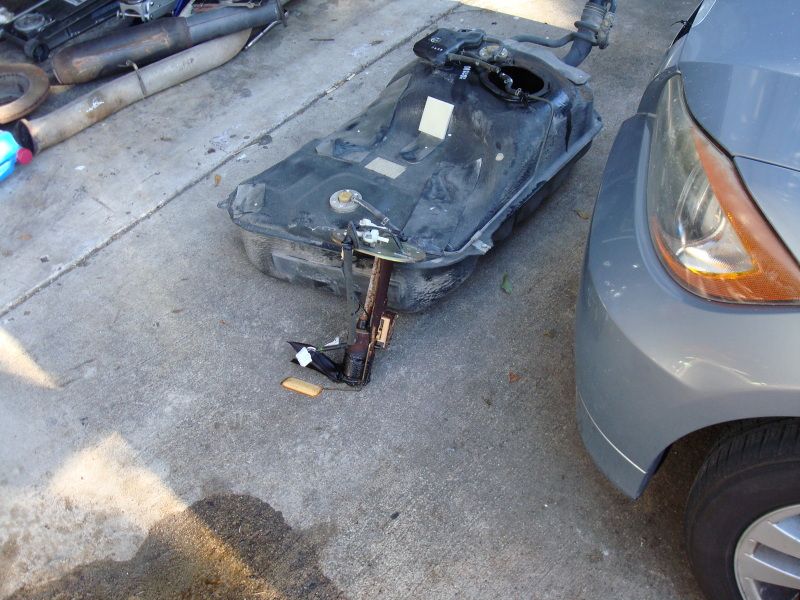
Dropped the gas tank and cleaned it as best I could. I plan on putting a fuel cell in the rear before too long anyway.


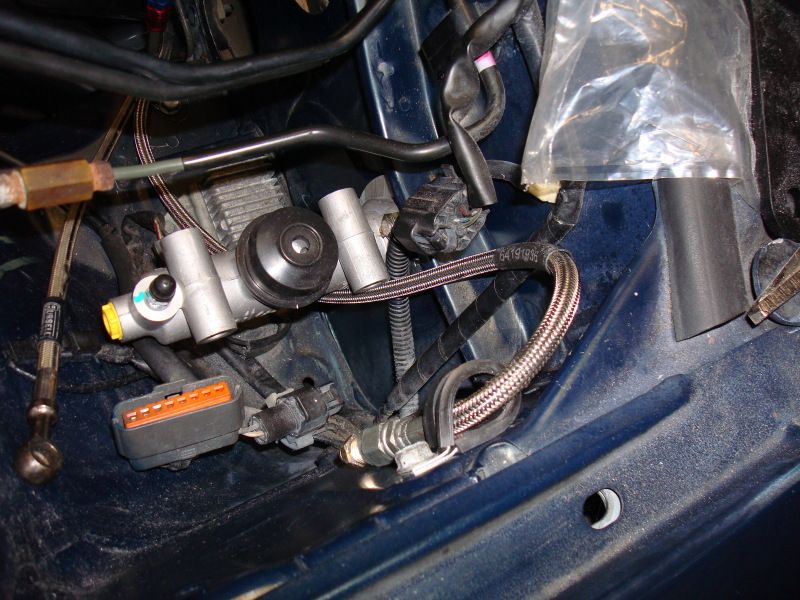
Did a 929 master cylinder install and reinstalled the ABS in the OEM location for now, but will move it behind passenger seat in the future. Also installed Wilwood clutch master and made a holder for my remote clutch bleeding line from the slave.


interior stripped out for cleaning


« Last Edit: September 22, 2014, 12:28:16 AM by markfluko »

Offline markfluko

Re: Typical FD LS1 swap
« Reply #5 on: January 19, 2013, 03:26:42 AM »
Made coolant lines for AST with -3 AN teflon ss hose.


Radiator, LS6 intake manifold, engine harness blah blah blah installed and it looked like this


Offline markfluko

Re: Typical FD LS1 swap
« Reply #6 on: January 19, 2013, 03:43:47 AM »
Stripped out entire OEM chassis harness. There is so much going on here it is ridiculous.


and that is still not even all of it pictured.

I started with the front chassis harness and began making it from scratch. I used GXL wire and tech flex T6 loom with Deutsch DT connectors and every wire was stripped using a my TW-1 thermal wire stripper as to not damage any wire  :) . I began by making a lay out of the harness on the garage floor. I have documented everything with a printed circuit board diagram program beforehand, so a lot of time was invested into this that may not be captured by camera.


I am going to have the front chassis harness connect to a 12 pin connector at the firewall, began laying the wire


moved my tape diagram inside and began the real work.


knees were really hurting from the damn tile floor so I had to bring a pillow out


Picture of LS PCM in OEM location


Offline markfluko

Re: Typical FD LS1 swap
« Reply #7 on: January 19, 2013, 04:07:16 AM »
Some realllllyyyy good meat at a local BBQ place


Front harness temporarily installed. I may be able to tuck it even more, but it is already a 1000x better than the OEM front harness and 9 fuse boxes.


For my fuseboxes I have an engine fusebox that is right above the PCM, and for my chassis fusebox I am using a Leash control box.


and the ABS and any other high amp electronic I may have in the future will run off the relay setup next to the main box


dash bar before


after sand blasting + fusebox installed


covered old harness holes


making the rear harness


I relocated my battery to behind the passenger seat because I want the lowest center of gravity as possible, and this seems to be the best. I plan to have the ABS unit right next to the battery in the future. And yes, the passenger seat still fits.


Still plenty of room for ABS

Ultra lightweight battery mount! I have brand new black carpet that I will need to cut for these tabs to clear.


I am relocating the ABS computer behind the drivers seat. I just bent the current tabs on it and it worked with some OEM bolt hole locations


After many hours, I have made a diagram of the ABS wiring, and am going to make an entirely stand along harness for it soon.


Offline markfluko

Re: Typical FD LS1 swap
« Reply #8 on: January 19, 2013, 04:15:39 AM »
To control the car, I am using Contura switches that will be mounted behind the shifter.

I wasn't sure if I should because I don't know if I will accidently hit the switches, but I figured what the hell. If it doesn't work out I can put them all on the CF sheet on the dash where the IGN and START switch will be.


I debated on whether or not to mod it to fit the fusebox below the ash tray/armrest, but decided to keep it on the dash bar behind the CF sheet. Although it does look like it would fit perfectly.


So from driver to passenger the switch order is blinkers(UP for L, DOWN for R), Hazards, Lights, Wipers, Horn.  IGN and START will be on CF sheet.


I am waiting to really clean the piece up before I rivet.

Made the harness for the switches to the fusebox that you can see in the background, and in the foreground I removed all the steering column stalk switches and put on my homeade rubber seal for what looks like bearing in there. The steering shaft is about 1.5" O.D., so I just went to Home Depot and got a rubber cap for some 1.5" pipe and cut a small hole then slipped the cap on and tightened it down.


OMP WRC steering wheel


Offline markfluko

Re: Typical FD LS1 swap
« Reply #9 on: January 19, 2013, 04:21:16 AM »
Made some custom headlights out of Hella 90mm bulbs and some other pieces I can give more info on tomorrow, it is too late for me tonight.


I just wanted to post my build thread for now to help me finish the car because I am almost done. I have over 500+ pics of everything and it still isn't 100% driveable yet. The first autox of the season is in March that I am I planning to drive the car at, so I need some motivation to help me get this ready.

I still need to put on Aerocatch hood pins, finish chassis wiring, fill diff with fluid, and make/get an exhaust... and a few other odds and ends. I will update this thread tomorrow with my headlight build, maybe some more dash build pics, and some more wiring pics.

Offline Sho Amo

Re: Typical FD LS1 swap
« Reply #10 on: January 19, 2013, 10:08:20 AM »
Looks great! I like your wiring work.

What area are you in?
[Sold] '90 GTU LS1/t56

Offline 7StarrsSin

Re: Typical FD LS1 swap
« Reply #11 on: January 19, 2013, 10:30:09 AM »
Welcome to the forum! Another nice build I'm watching....
:drive: :poke: :gruffy:

Offline turbotalon1g

Re: Typical FD LS1 swap
« Reply #12 on: January 19, 2013, 12:41:36 PM »
Nice work, you sure do like that rivet gun.

I love those style switches (Conturas) I have a bunch of them.

Offline MDoe8

Re: Typical FD LS1 swap
« Reply #13 on: January 19, 2013, 03:21:44 PM »
Not a typical build at all!  Definitely a restoration.  Nicely done.
Dodge Stealth LM7 Twin Turbo

Offline FC3S Murray

Re: Typical FD LS1 swap
« Reply #14 on: January 19, 2013, 03:43:28 PM »
Great attention to detail bud! Welcome and I will be watching :secret:


13 years of abuse and still running STRONG!

SRM Performance Tuning LLC
https://www.instagram.com/fc3s_murray/?hl=en